Documentation
Complete guide to installing, configuring, and using 3DTrax Pro.
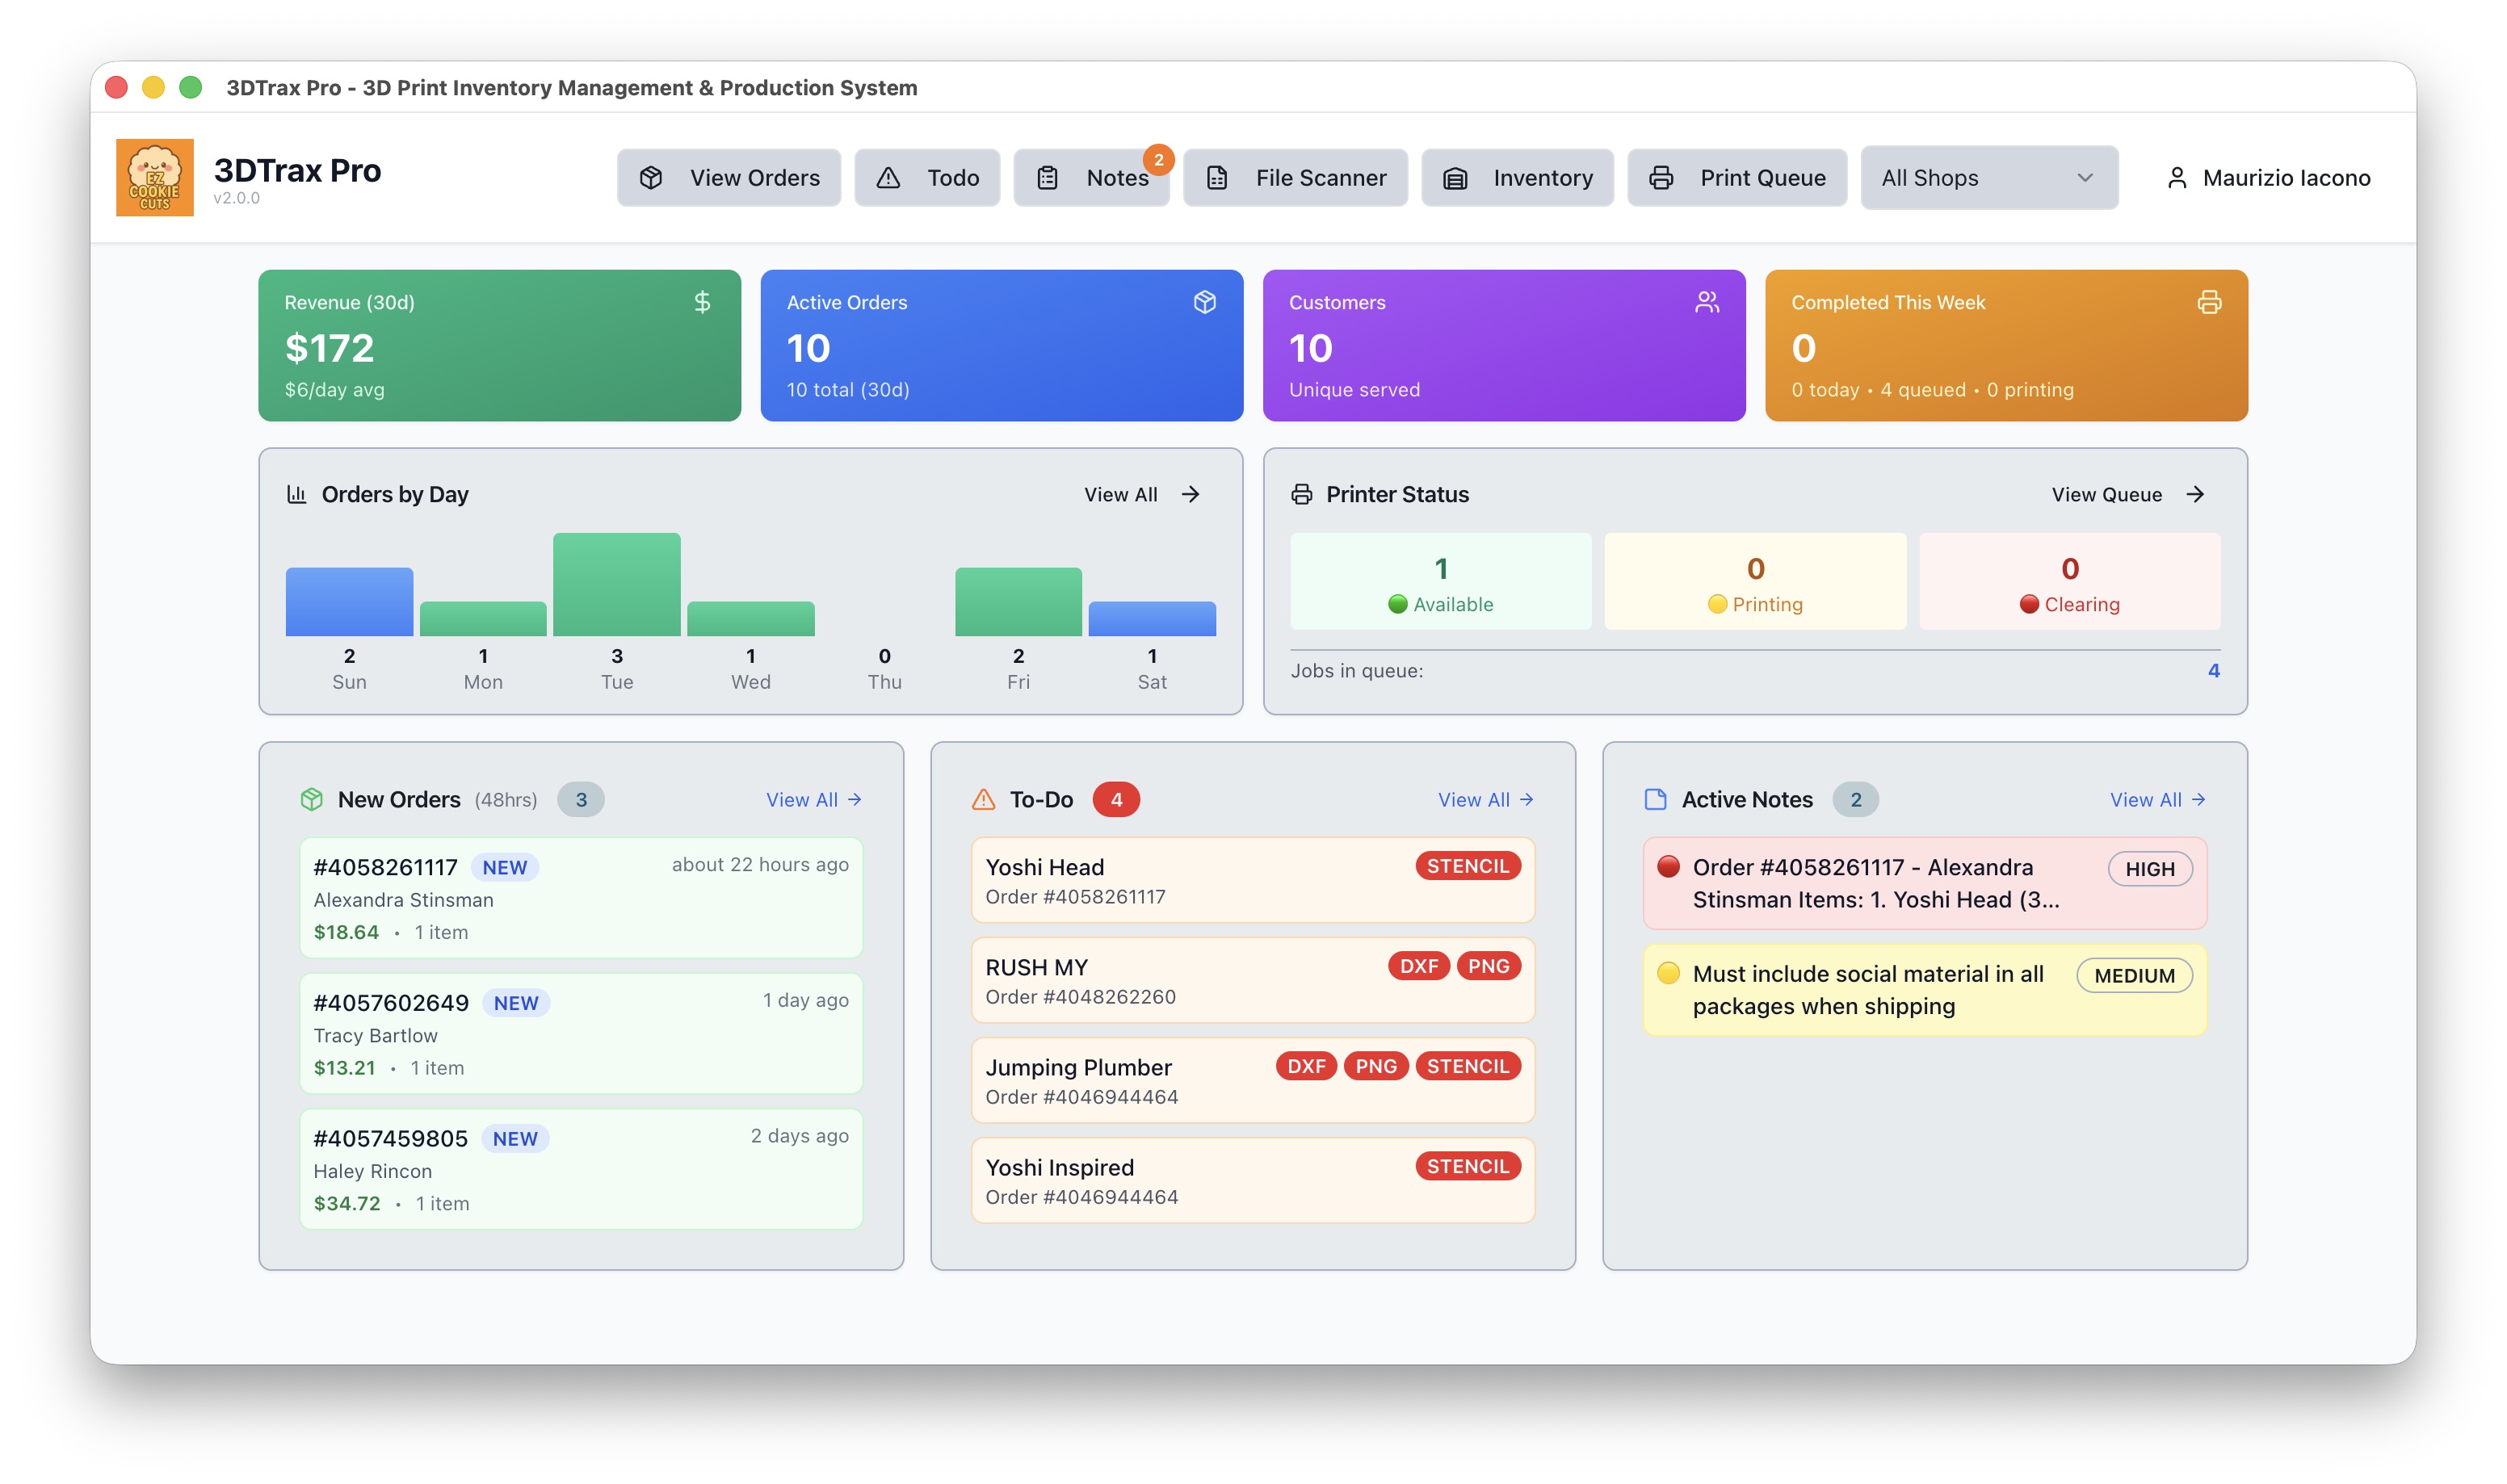
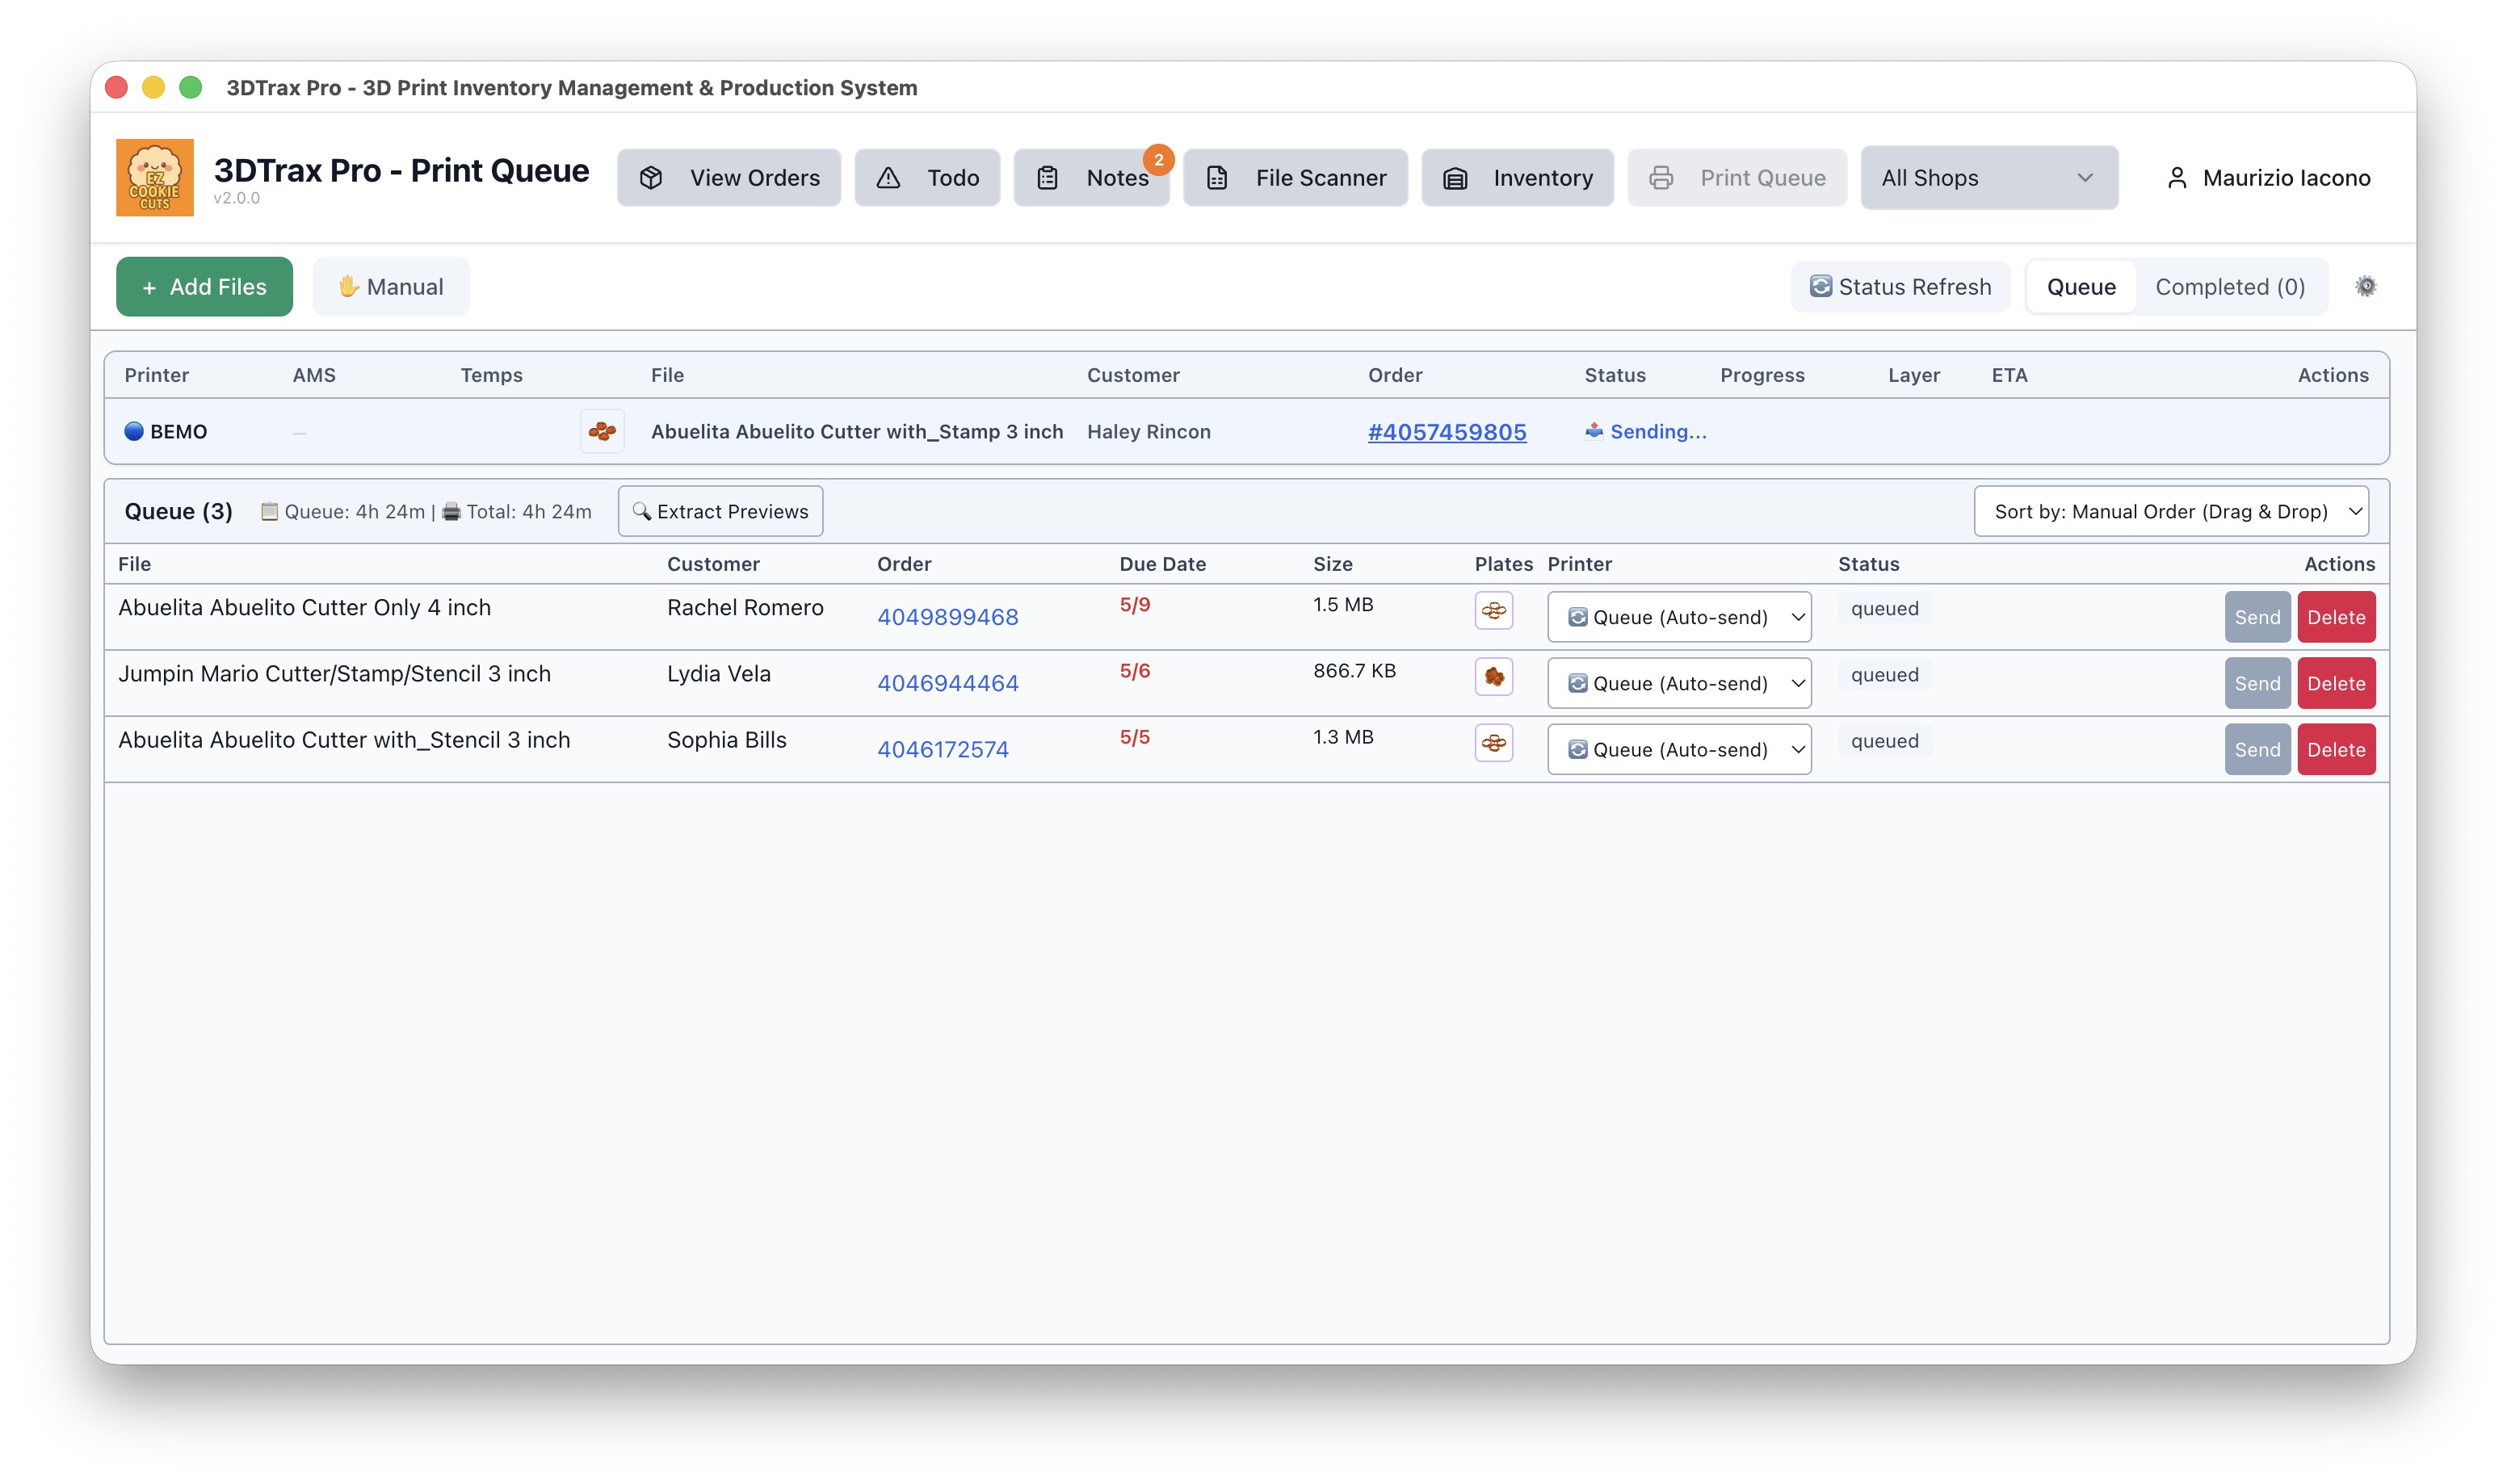
The 3DTrax Pro dashboard — your command center for managing orders, print queues, and production workflow.
System Requirements
macOS
- • macOS 10.15+ (Catalina)
- • Intel & Apple Silicon
- • 4GB RAM minimum
- • 500MB disk space
Windows
- • Windows 10/11
- • 64-bit (x64)
- • 4GB RAM minimum
- • 500MB disk space
Network Requirements
Internet connection required for Gmail sync, cloud sync, and printer communication. Bambu Lab printers must be on the same local network (LAN mode enabled).
Download & Install
Download the Installer
Download 3DTrax Pro from GitHub Releases:
- Mac (Apple Silicon): 3DTrax.Pro-2.0.0-arm64.dmg
- Mac (Intel): 3DTrax.Pro-2.0.0-x64.dmg
- Windows: 3DTrax.Pro.Setup.2.0.0.exe
Install on macOS
- Open the
.dmgfile - Drag 3DTrax Pro to your Applications folder
- First launch: Right-click the app → Open
- Click Open again when the security dialog appears
Install on Windows
- Run the
.exeinstaller - Follow the installation wizard
- Launch from Start menu or desktop shortcut
Setup Wizard
On first launch, the Setup Wizard walks you through configuring your shop profile. This takes 2-3 minutes and can be updated later in Settings.
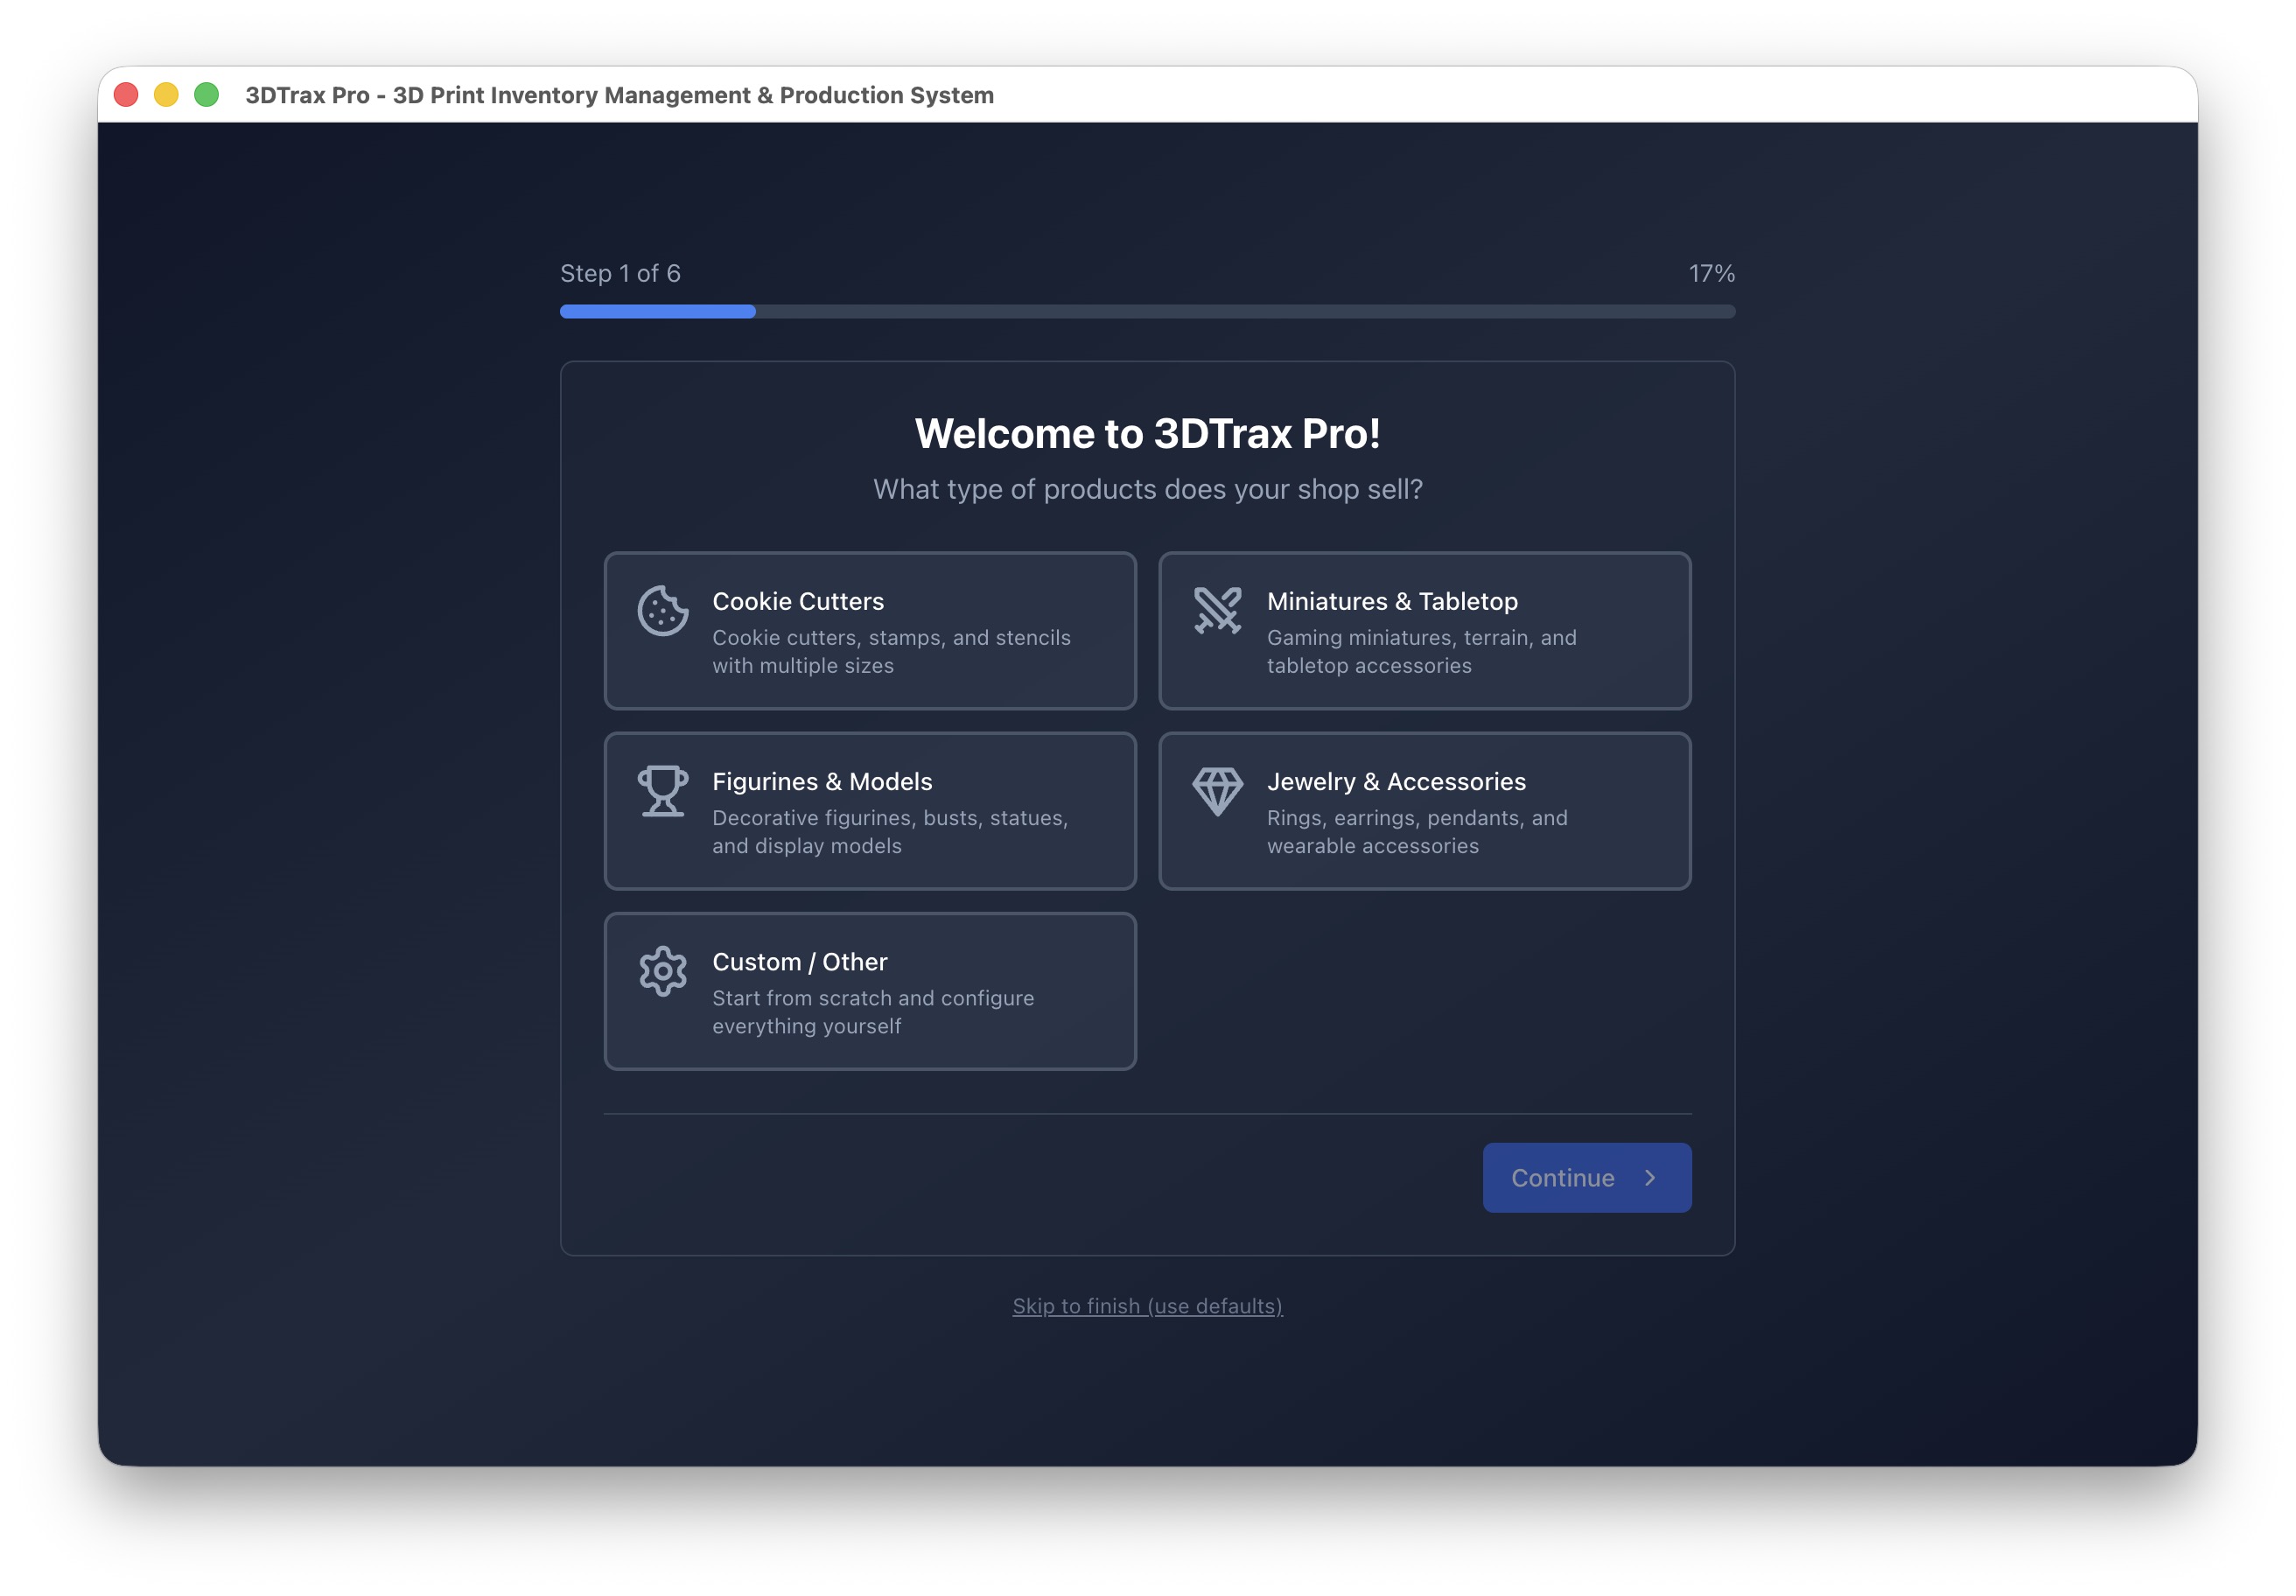
Choose Your Business Type
Select a preset that matches your products. Each preset comes pre-configured with common styles, sizes, and file types.
Shop Information
Enter your shop details. These are used throughout the app and for order matching.

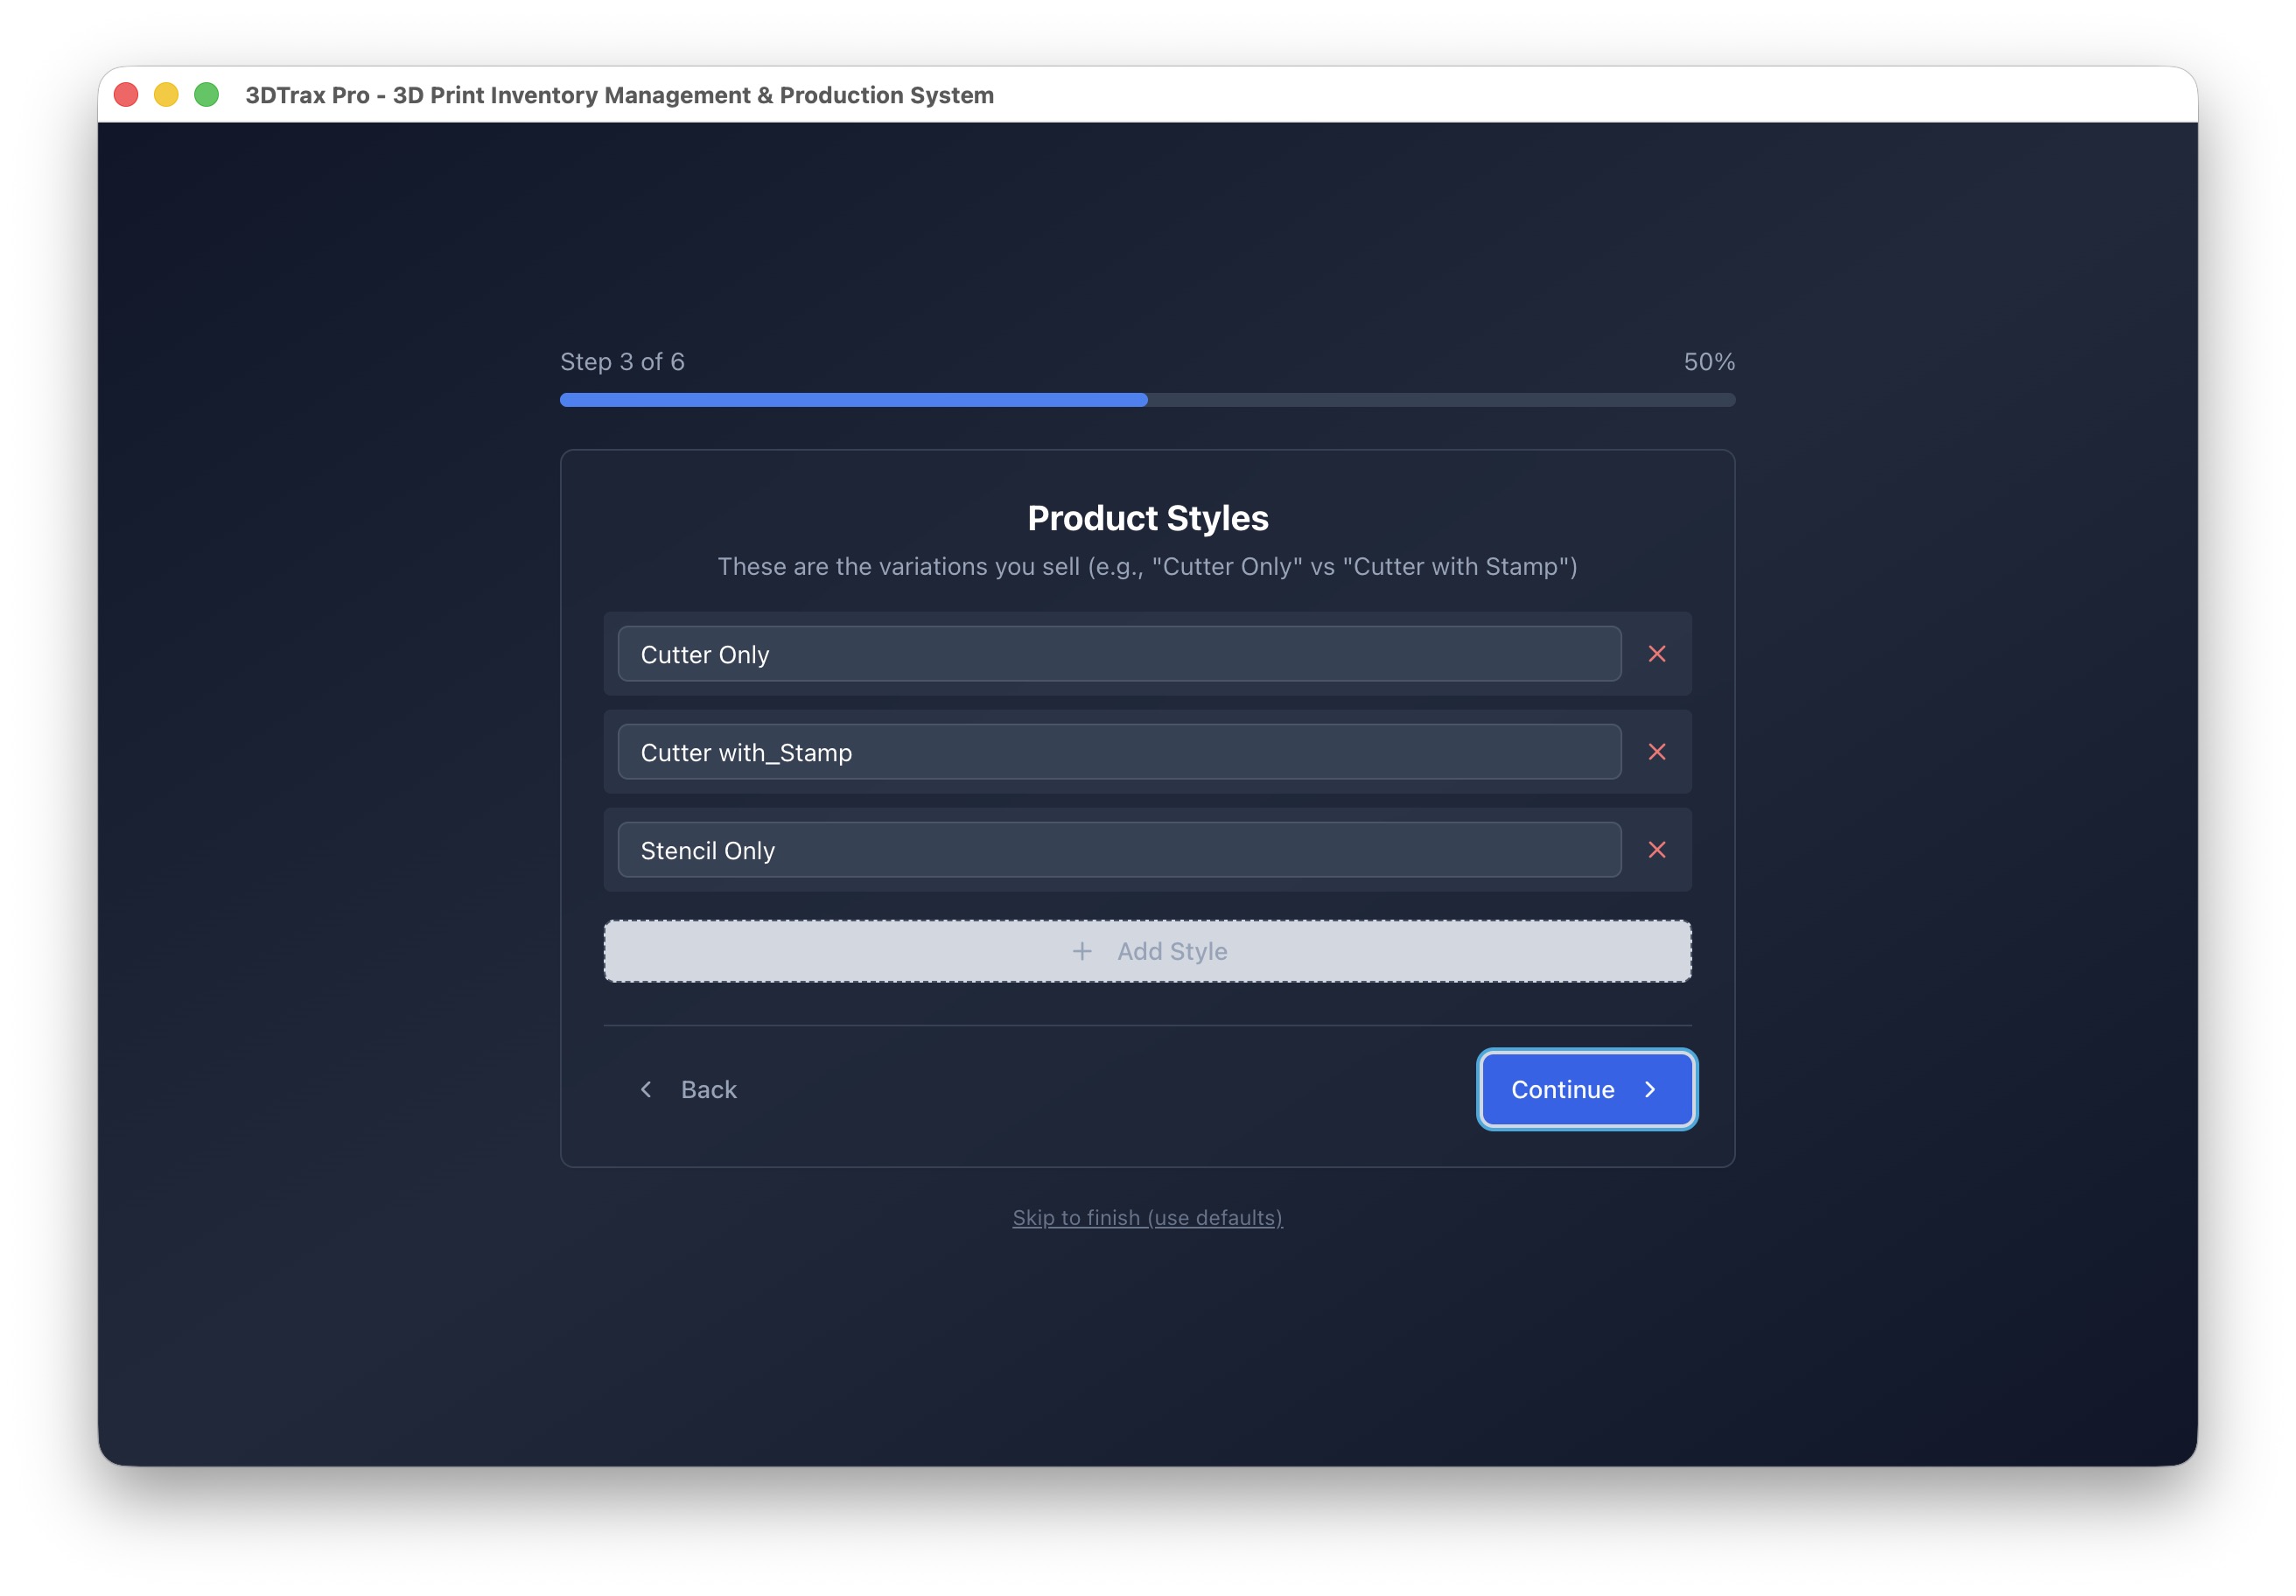
Product Styles
Define the variations you sell. These map to your file naming and order parsing.
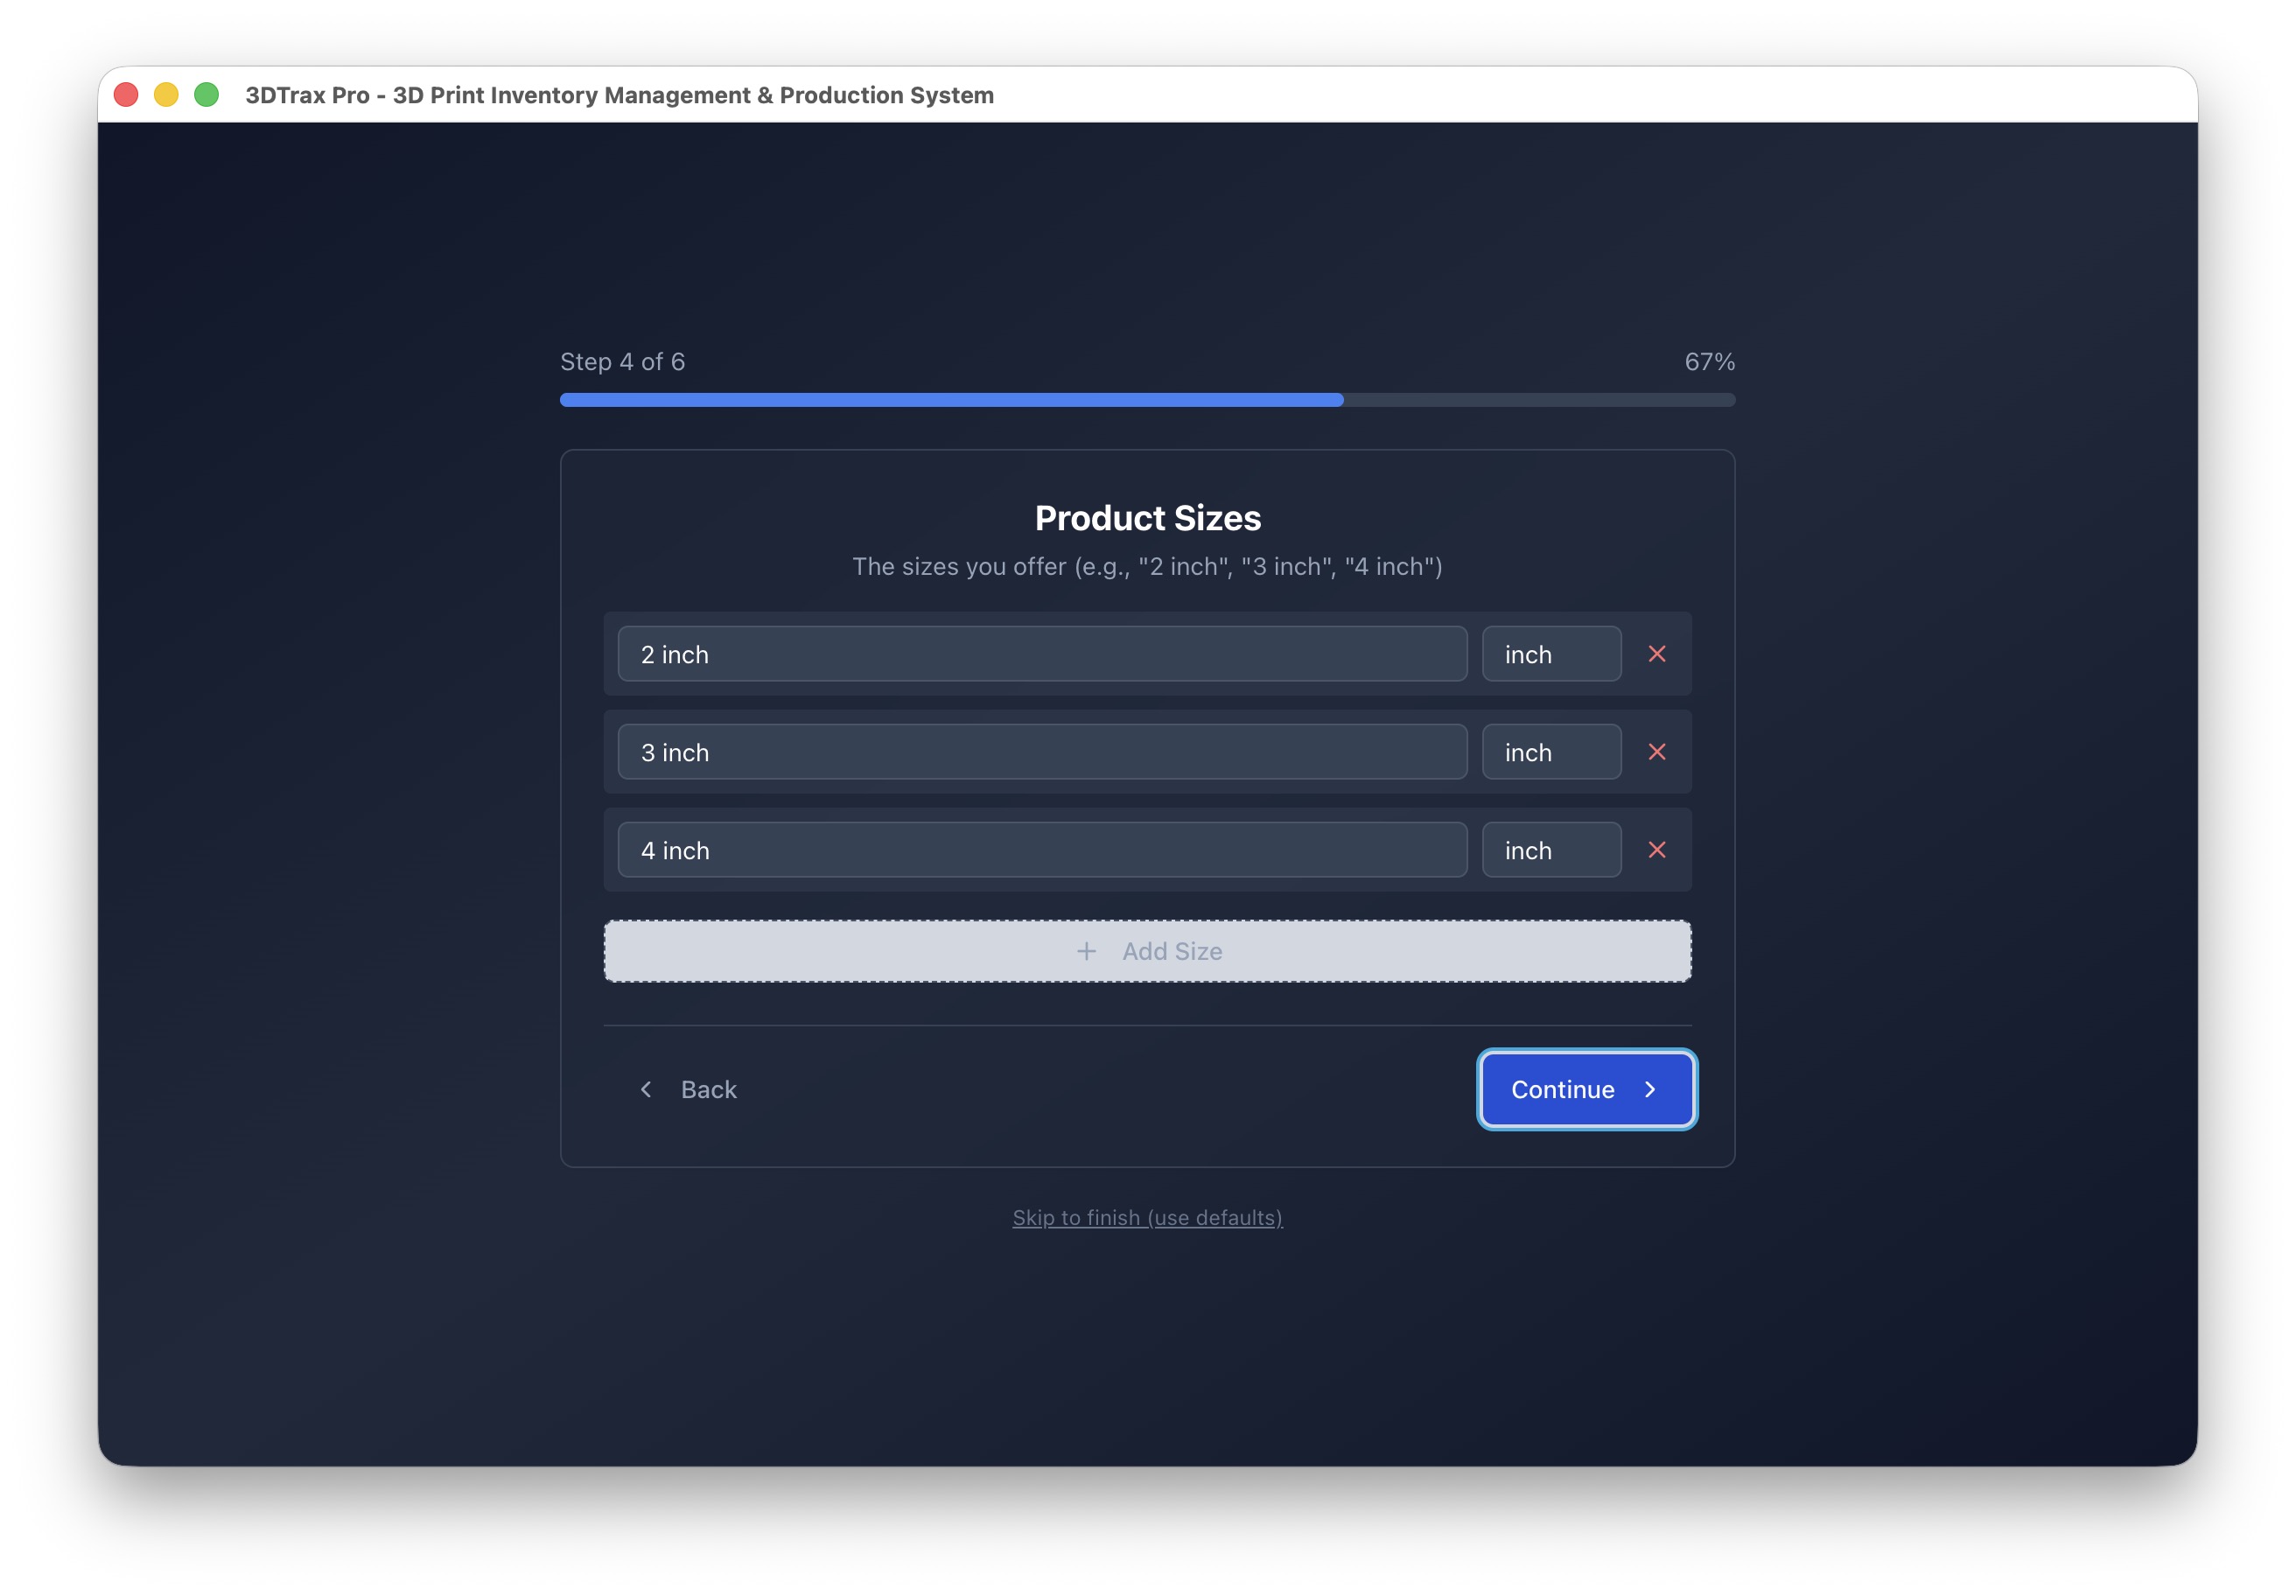
Product Sizes
The sizes you offer. These must match the size portion of your file names.
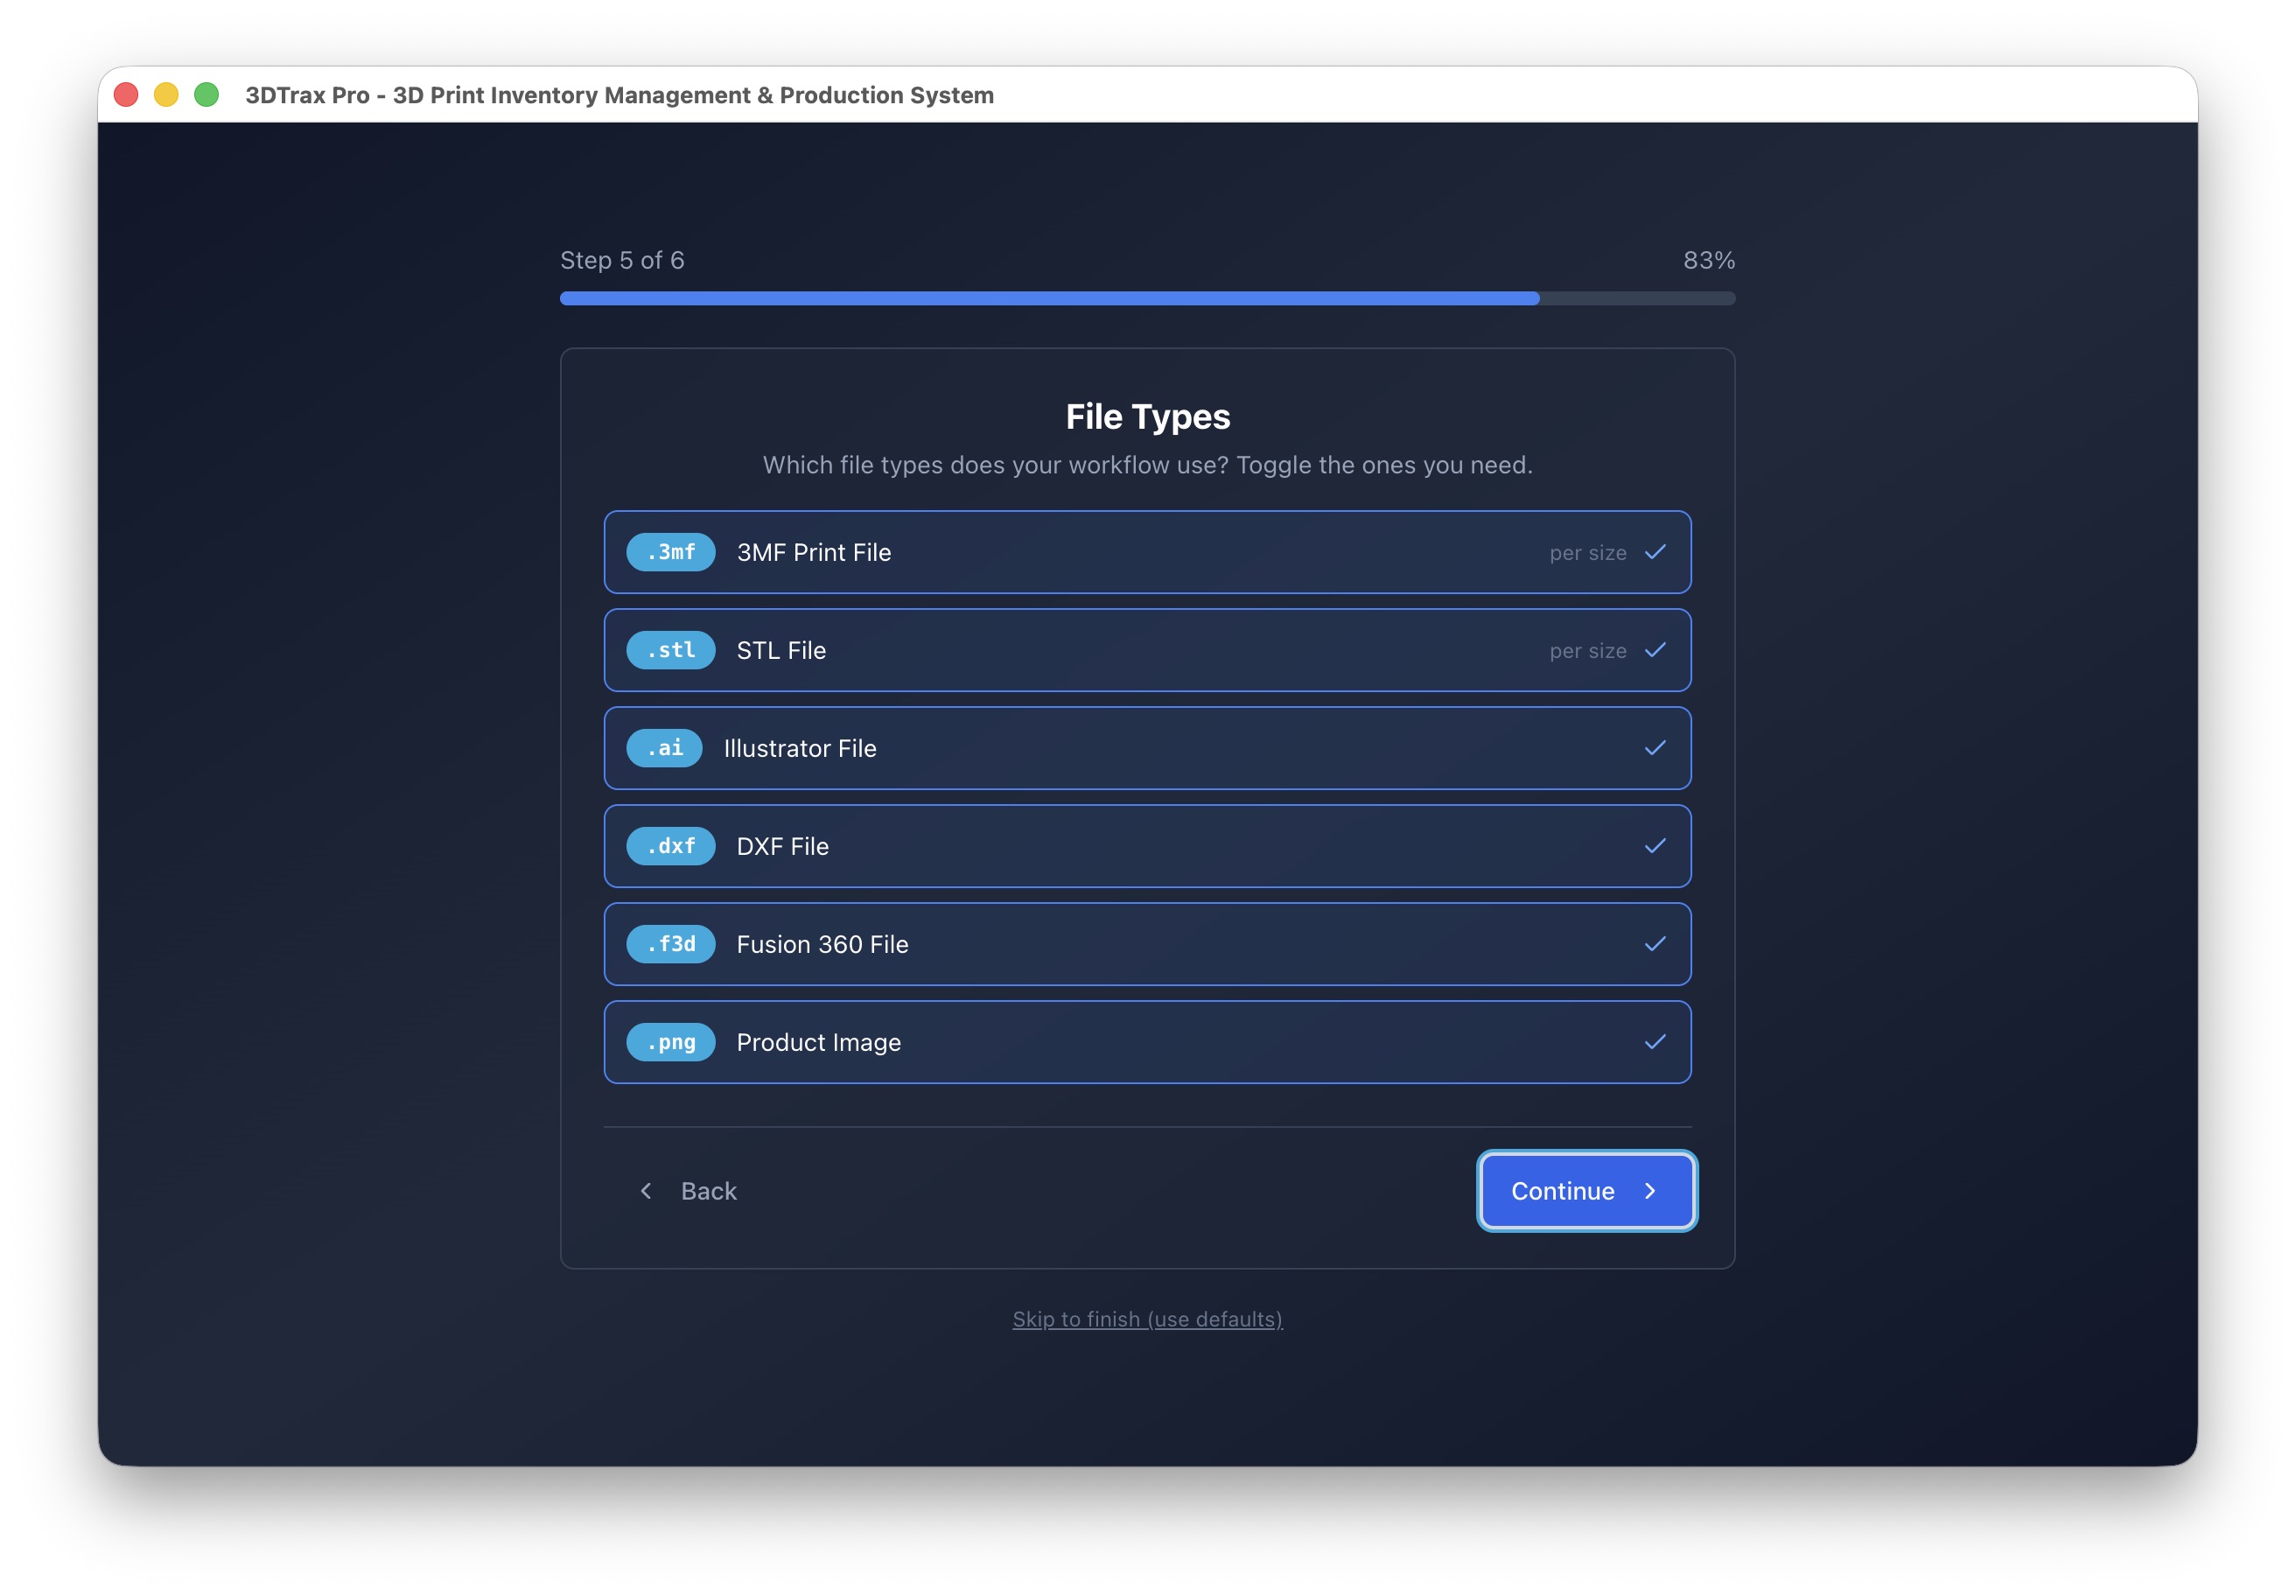
File Types
Toggle which file types your workflow uses. Enable only what you need for a cleaner interface.
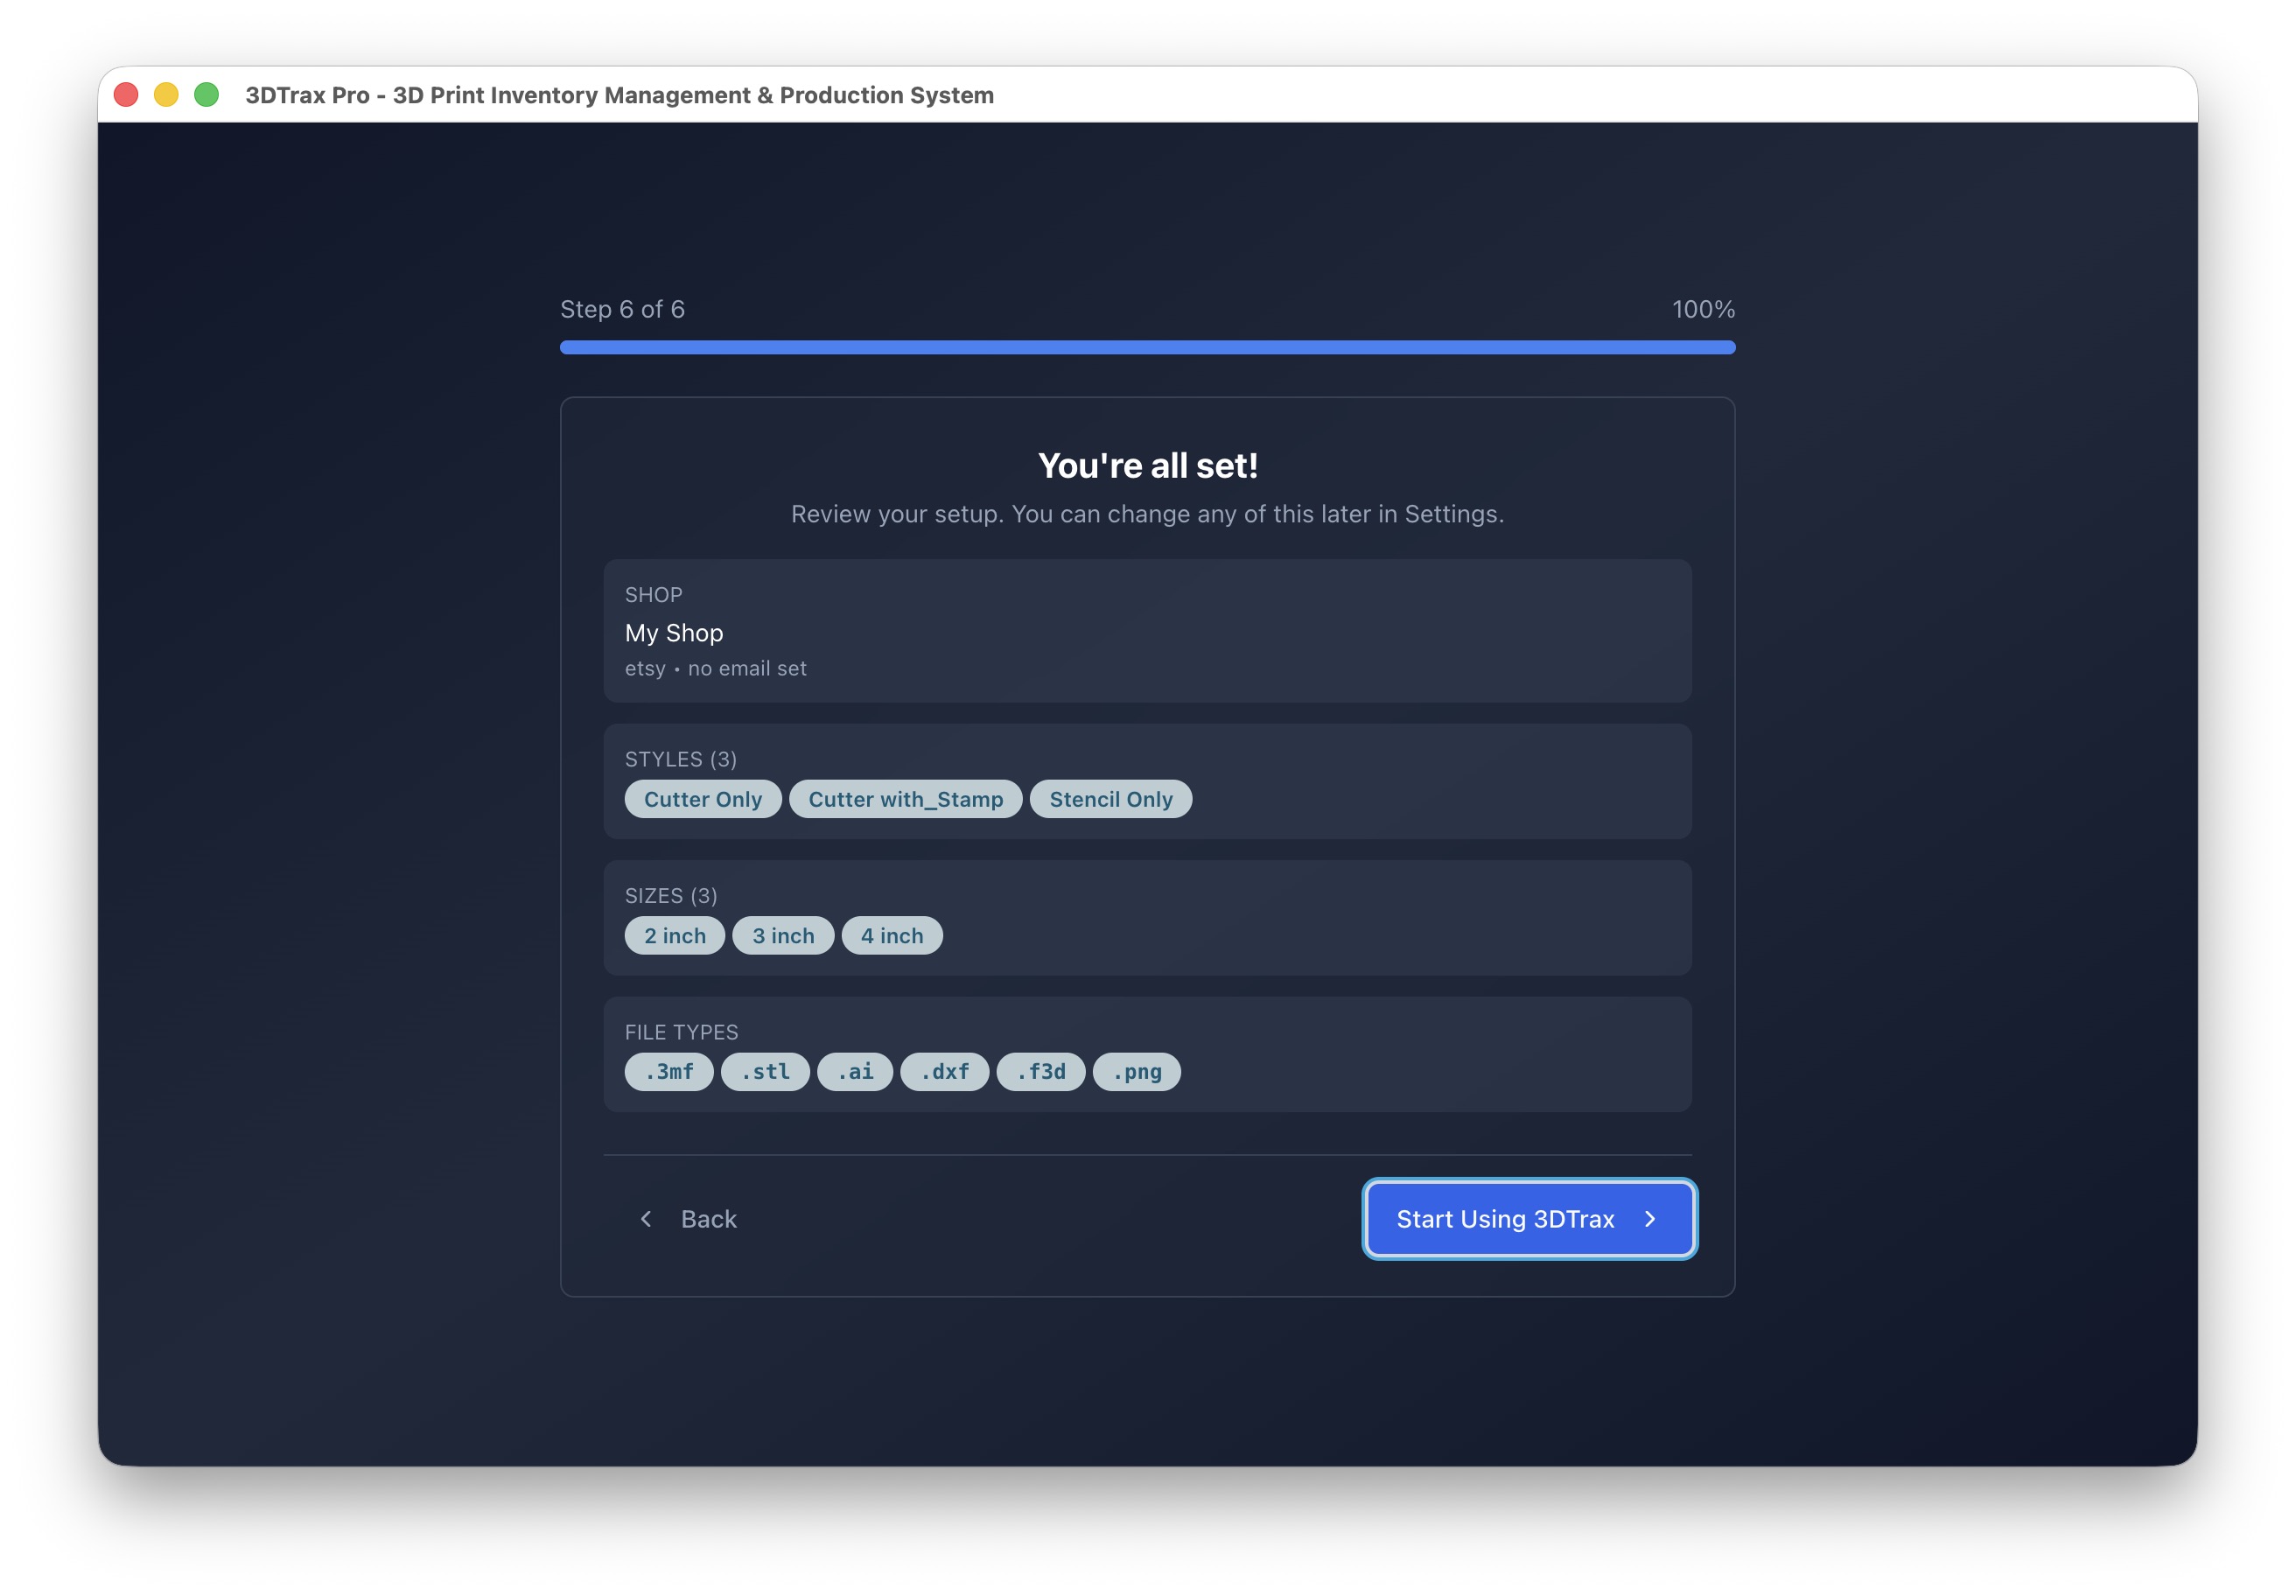
Review & Complete
Review your configuration and click Start Using 3DTrax. You can change any of this later in Settings → Shop Profile.
Your First Workflow
Sync Orders from Gmail
Connect your Gmail account to automatically import orders:
- Go to Settings → Gmail Accounts
- Click Add Gmail Account
- Sign in with Google and grant permission
- Orders appear automatically — green badges show files found, red shows missing

Configure File Library
Point 3DTrax to your design files:
- Go to Settings → File Manager
- Set your Dropbox Root Path (e.g.,
/Users/name/Dropbox/YourShop) - Set your Master CSV Path
- File Scanner indexes 3MF, STL, AI, DXF, and PNG files automatically
Add Your Printer
Connect your Bambu Lab printer for direct printing:
- Go to Settings → Printers
- Click Add Printer
- Enter from your printer's touchscreen:
- • IP Address (Network → Wi-Fi)
- • Access Code (Network → LAN Mode)
- • Serial Number (Device → About)
- Click Test Connection to verify
- Enable AMS if you have one — filament colors auto-detect
Send to Print Queue
Start your first print job:
- In Orders, find an order with green 3MF status
- Click the 3D Print button (or select multiple and Print Selected)
- Choose Arrange on Plate or Send to Queue
- In Print Queue, drag to reorder priority
- Click Send to Printer, select printer and AMS slot
Additional Features
Todo List
Track tasks and follow-ups for each order. Never miss a deadline.
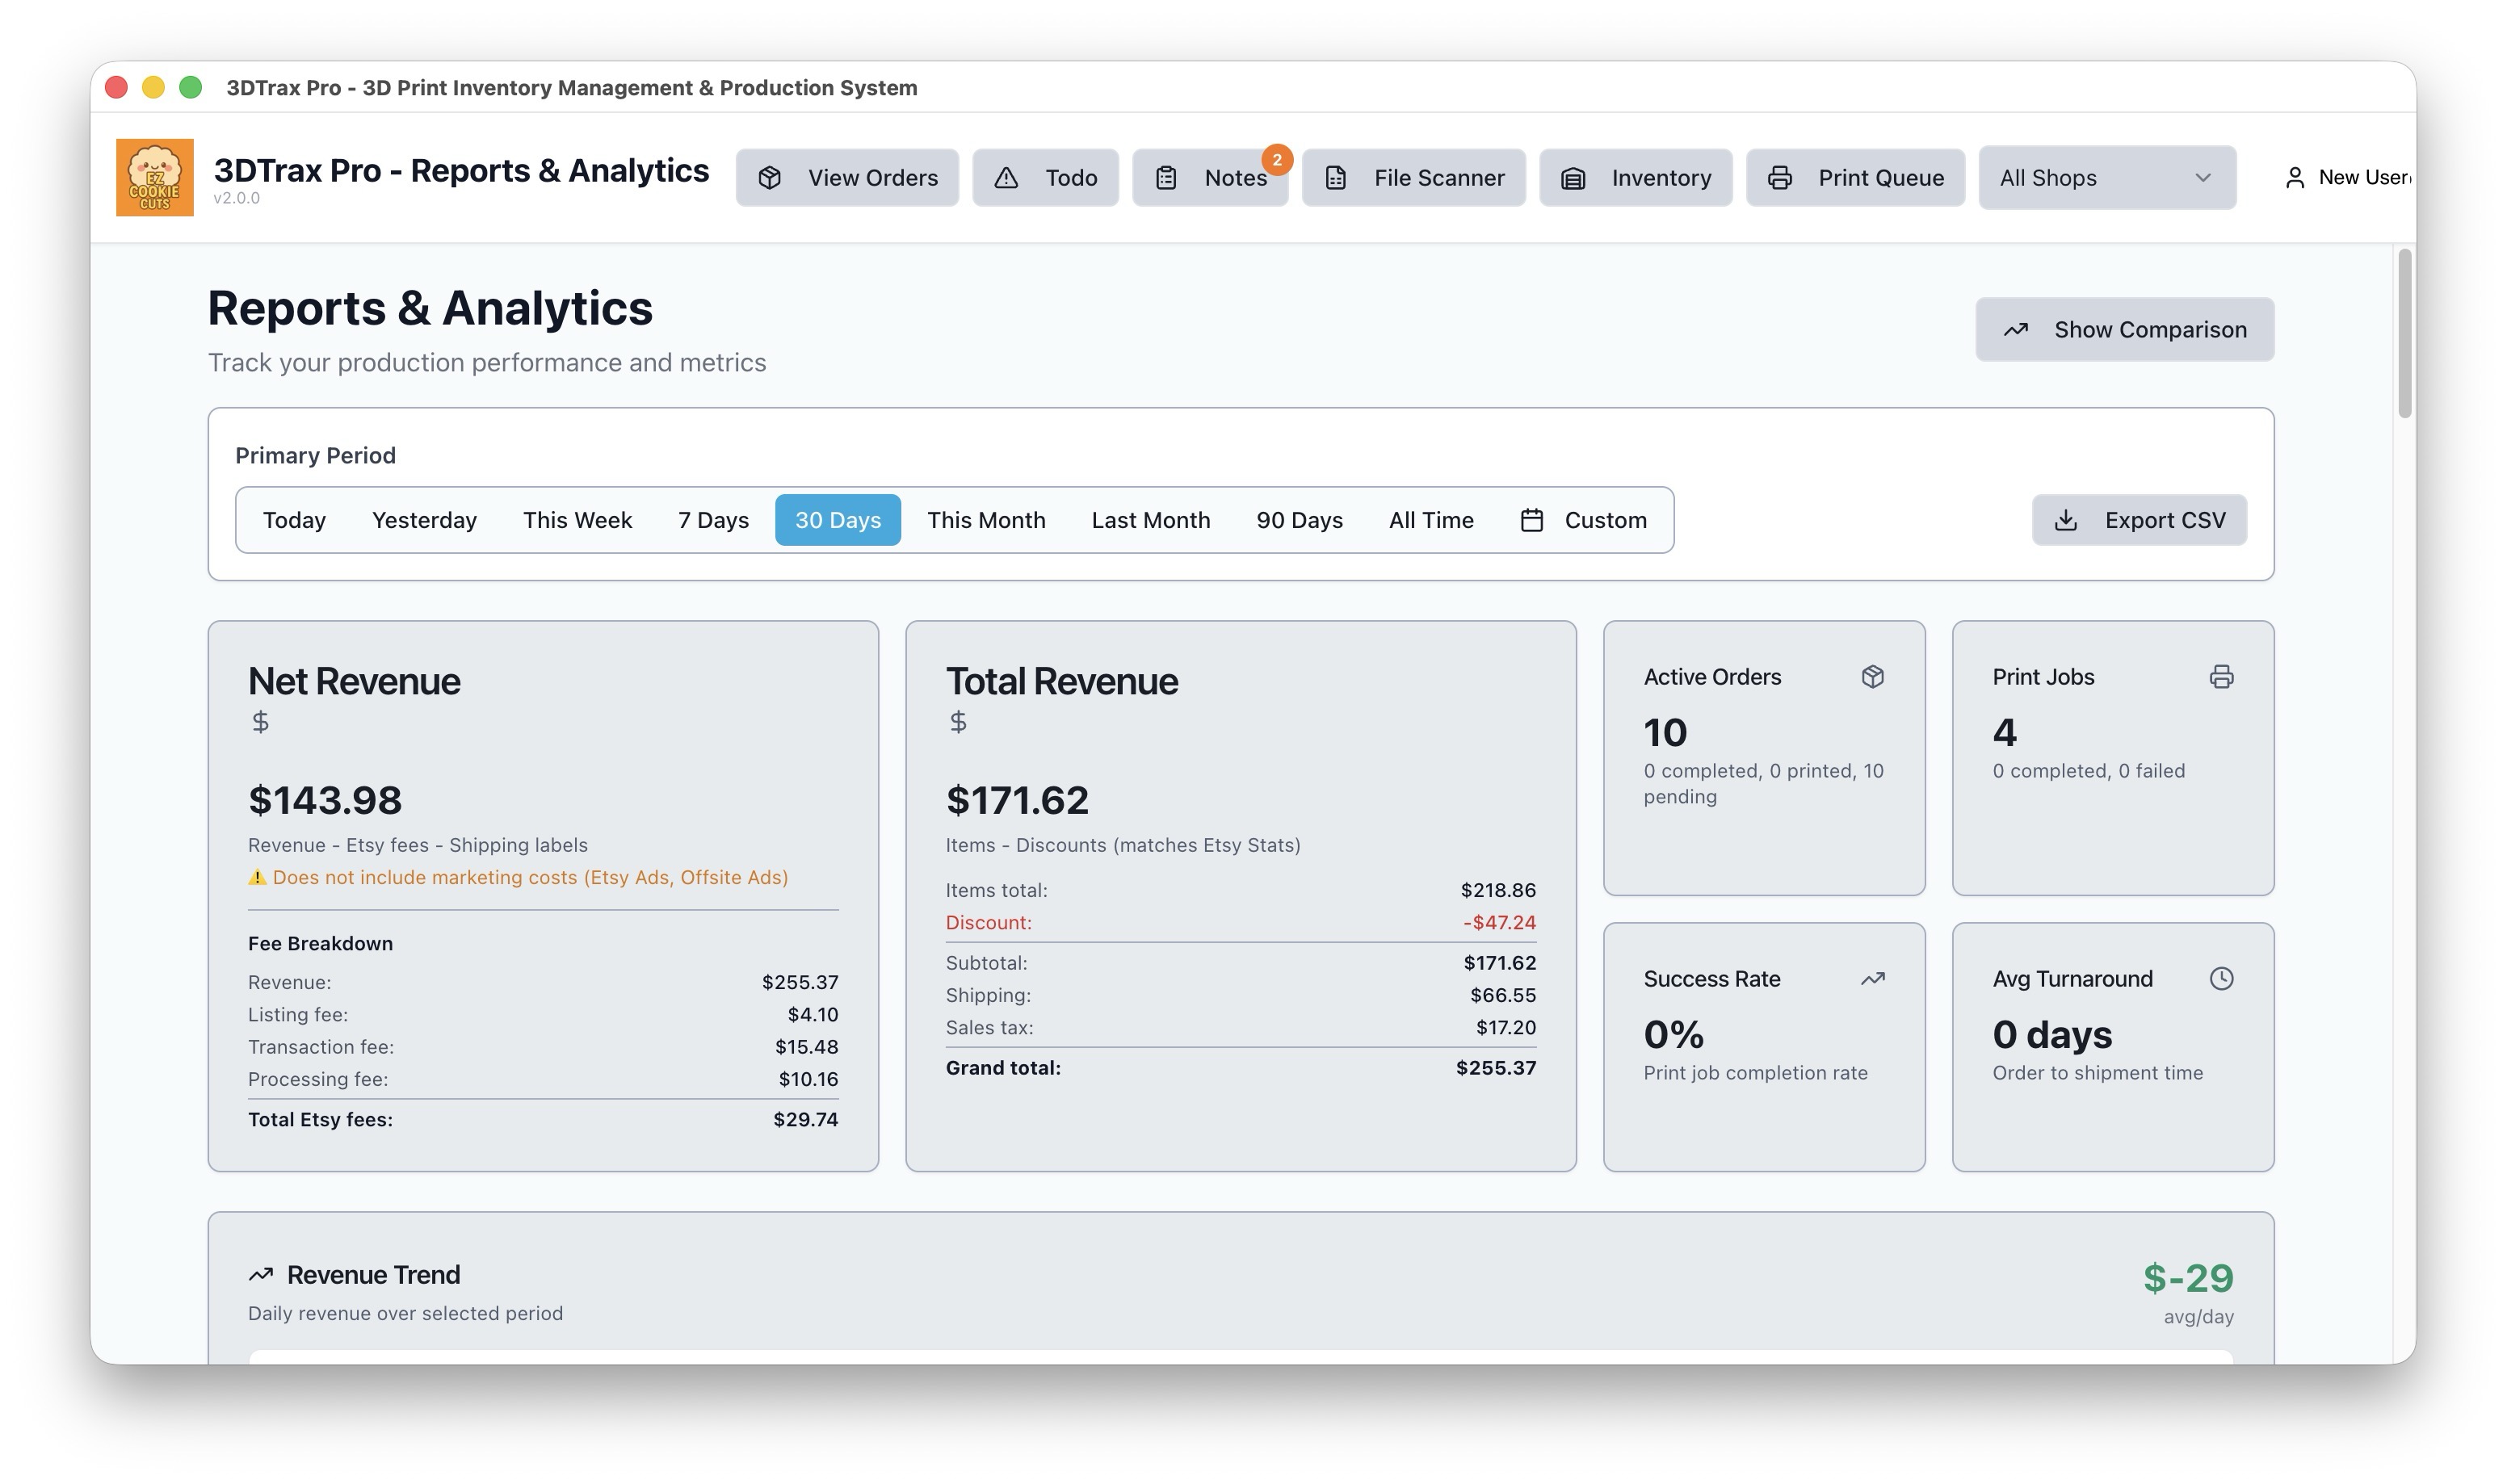
Reports
Analytics on orders, prints, revenue, and printer utilization.
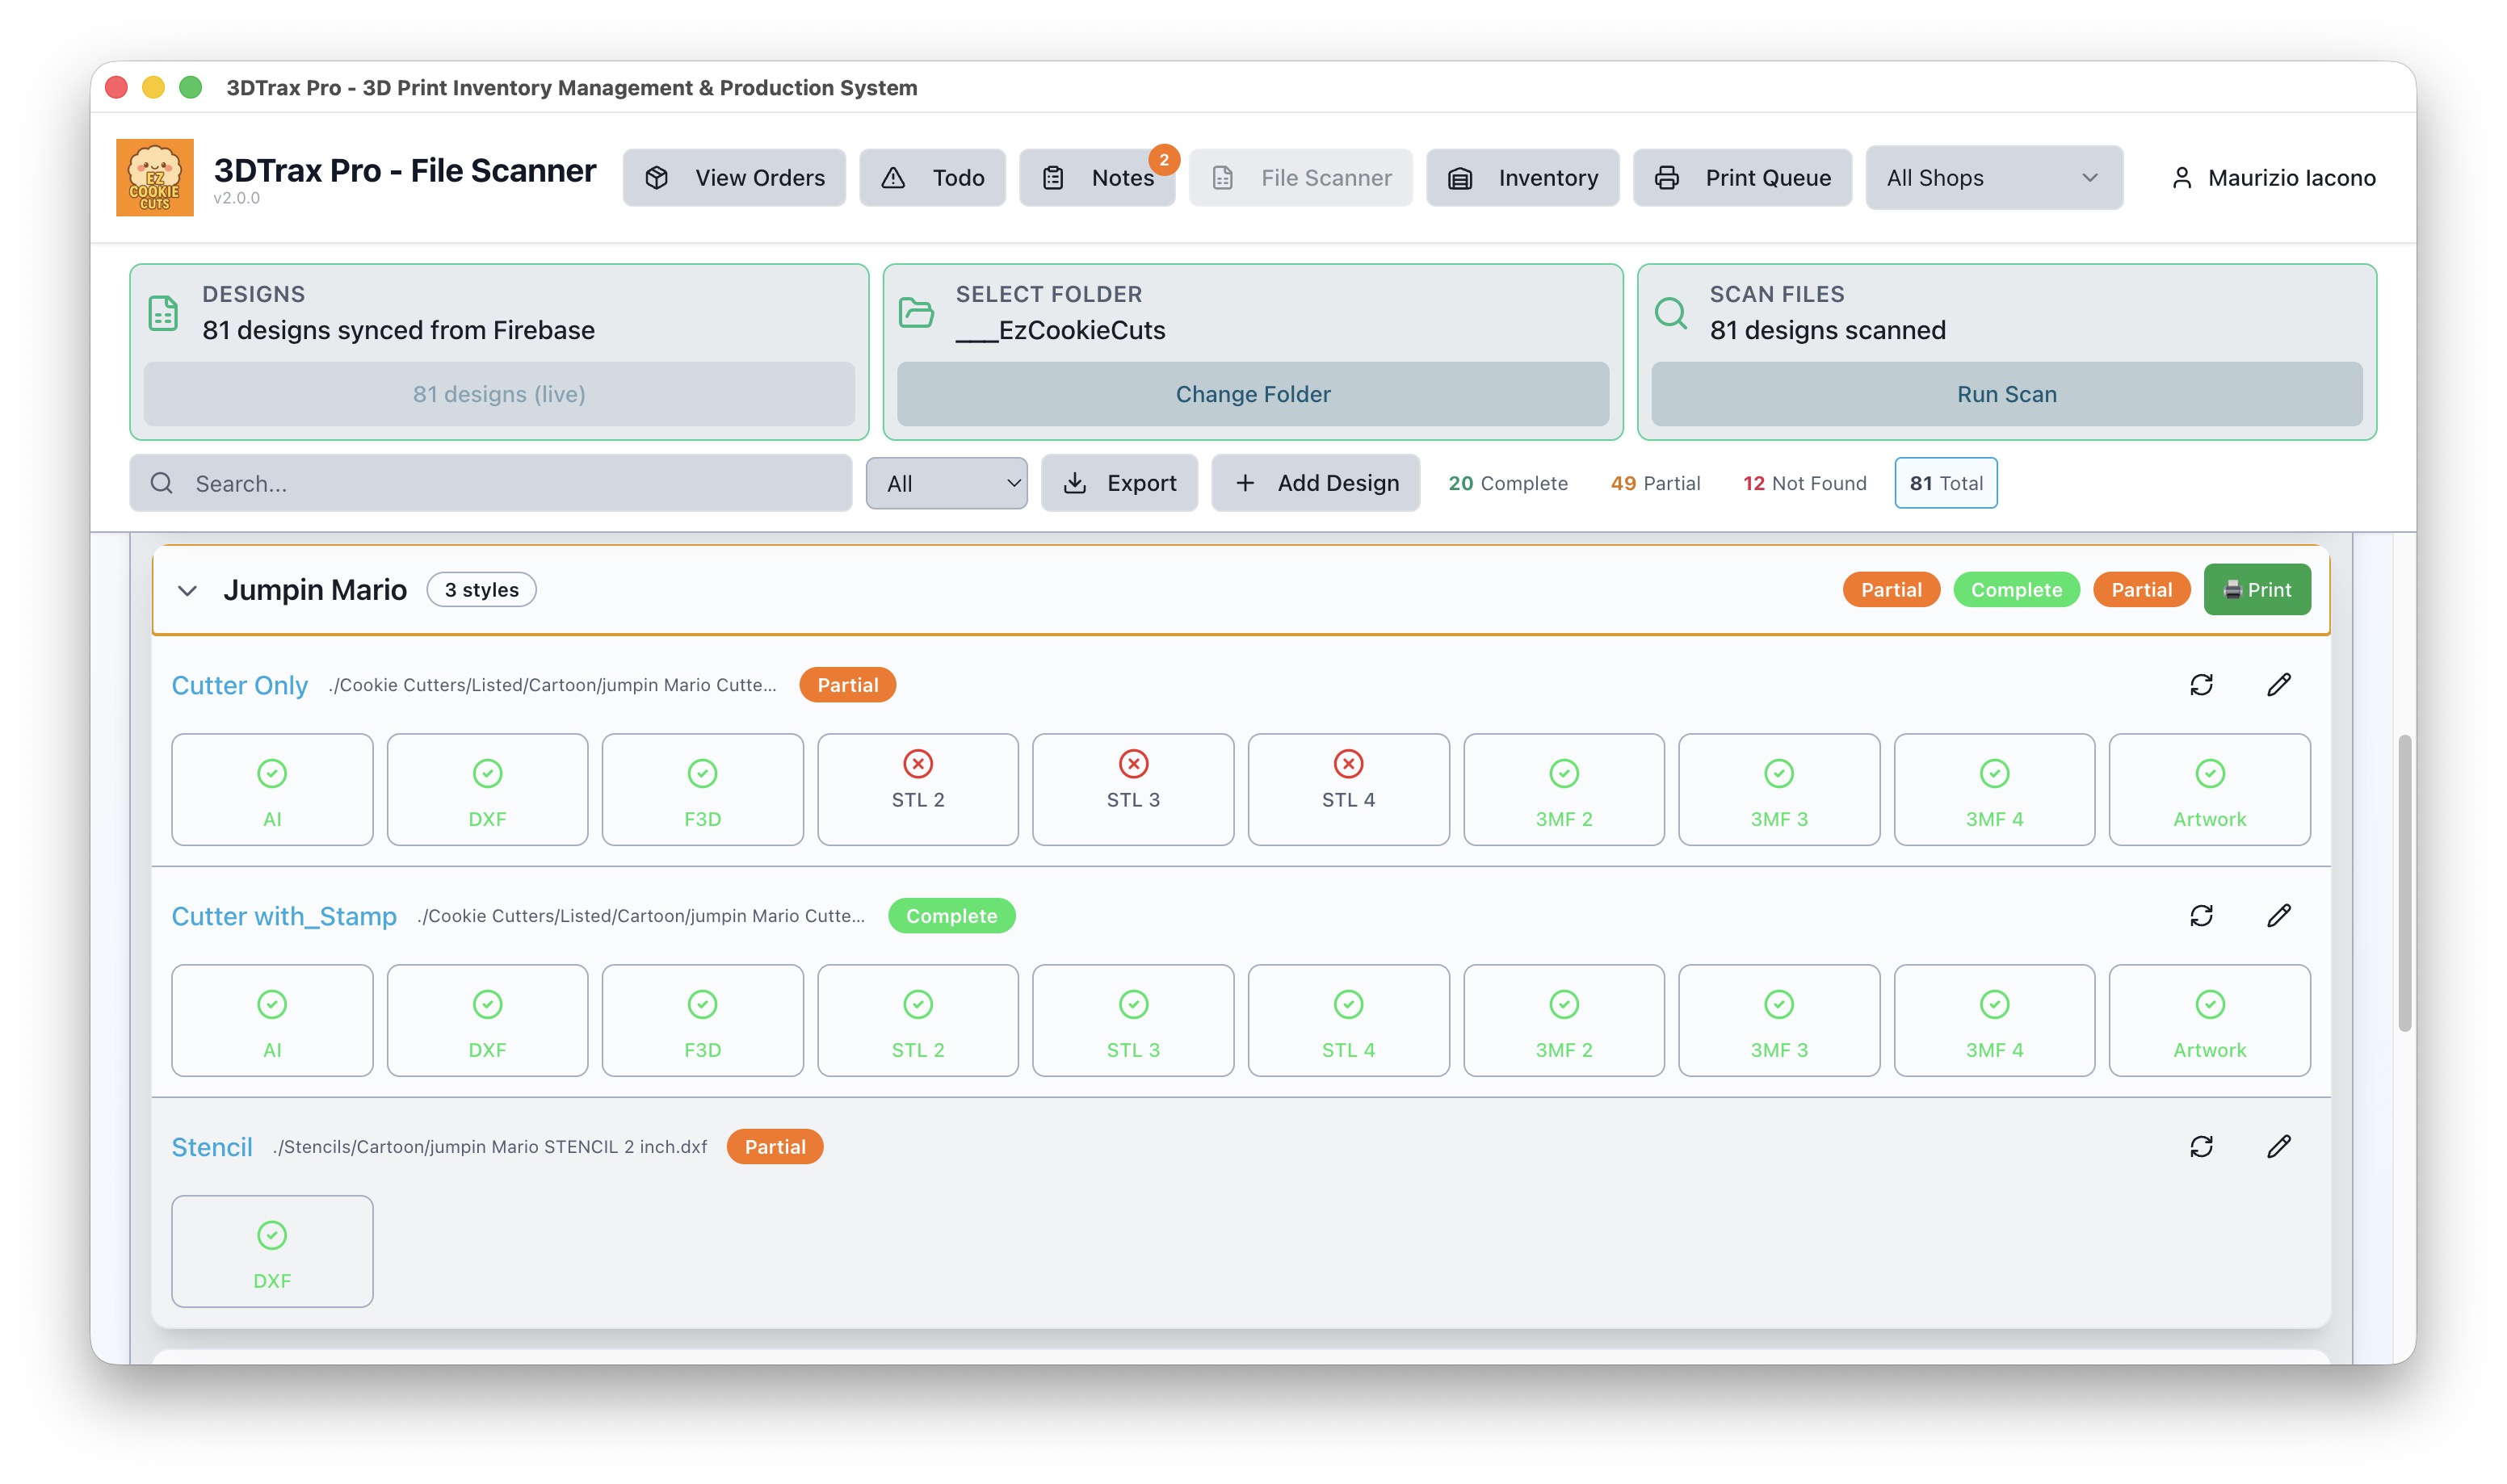
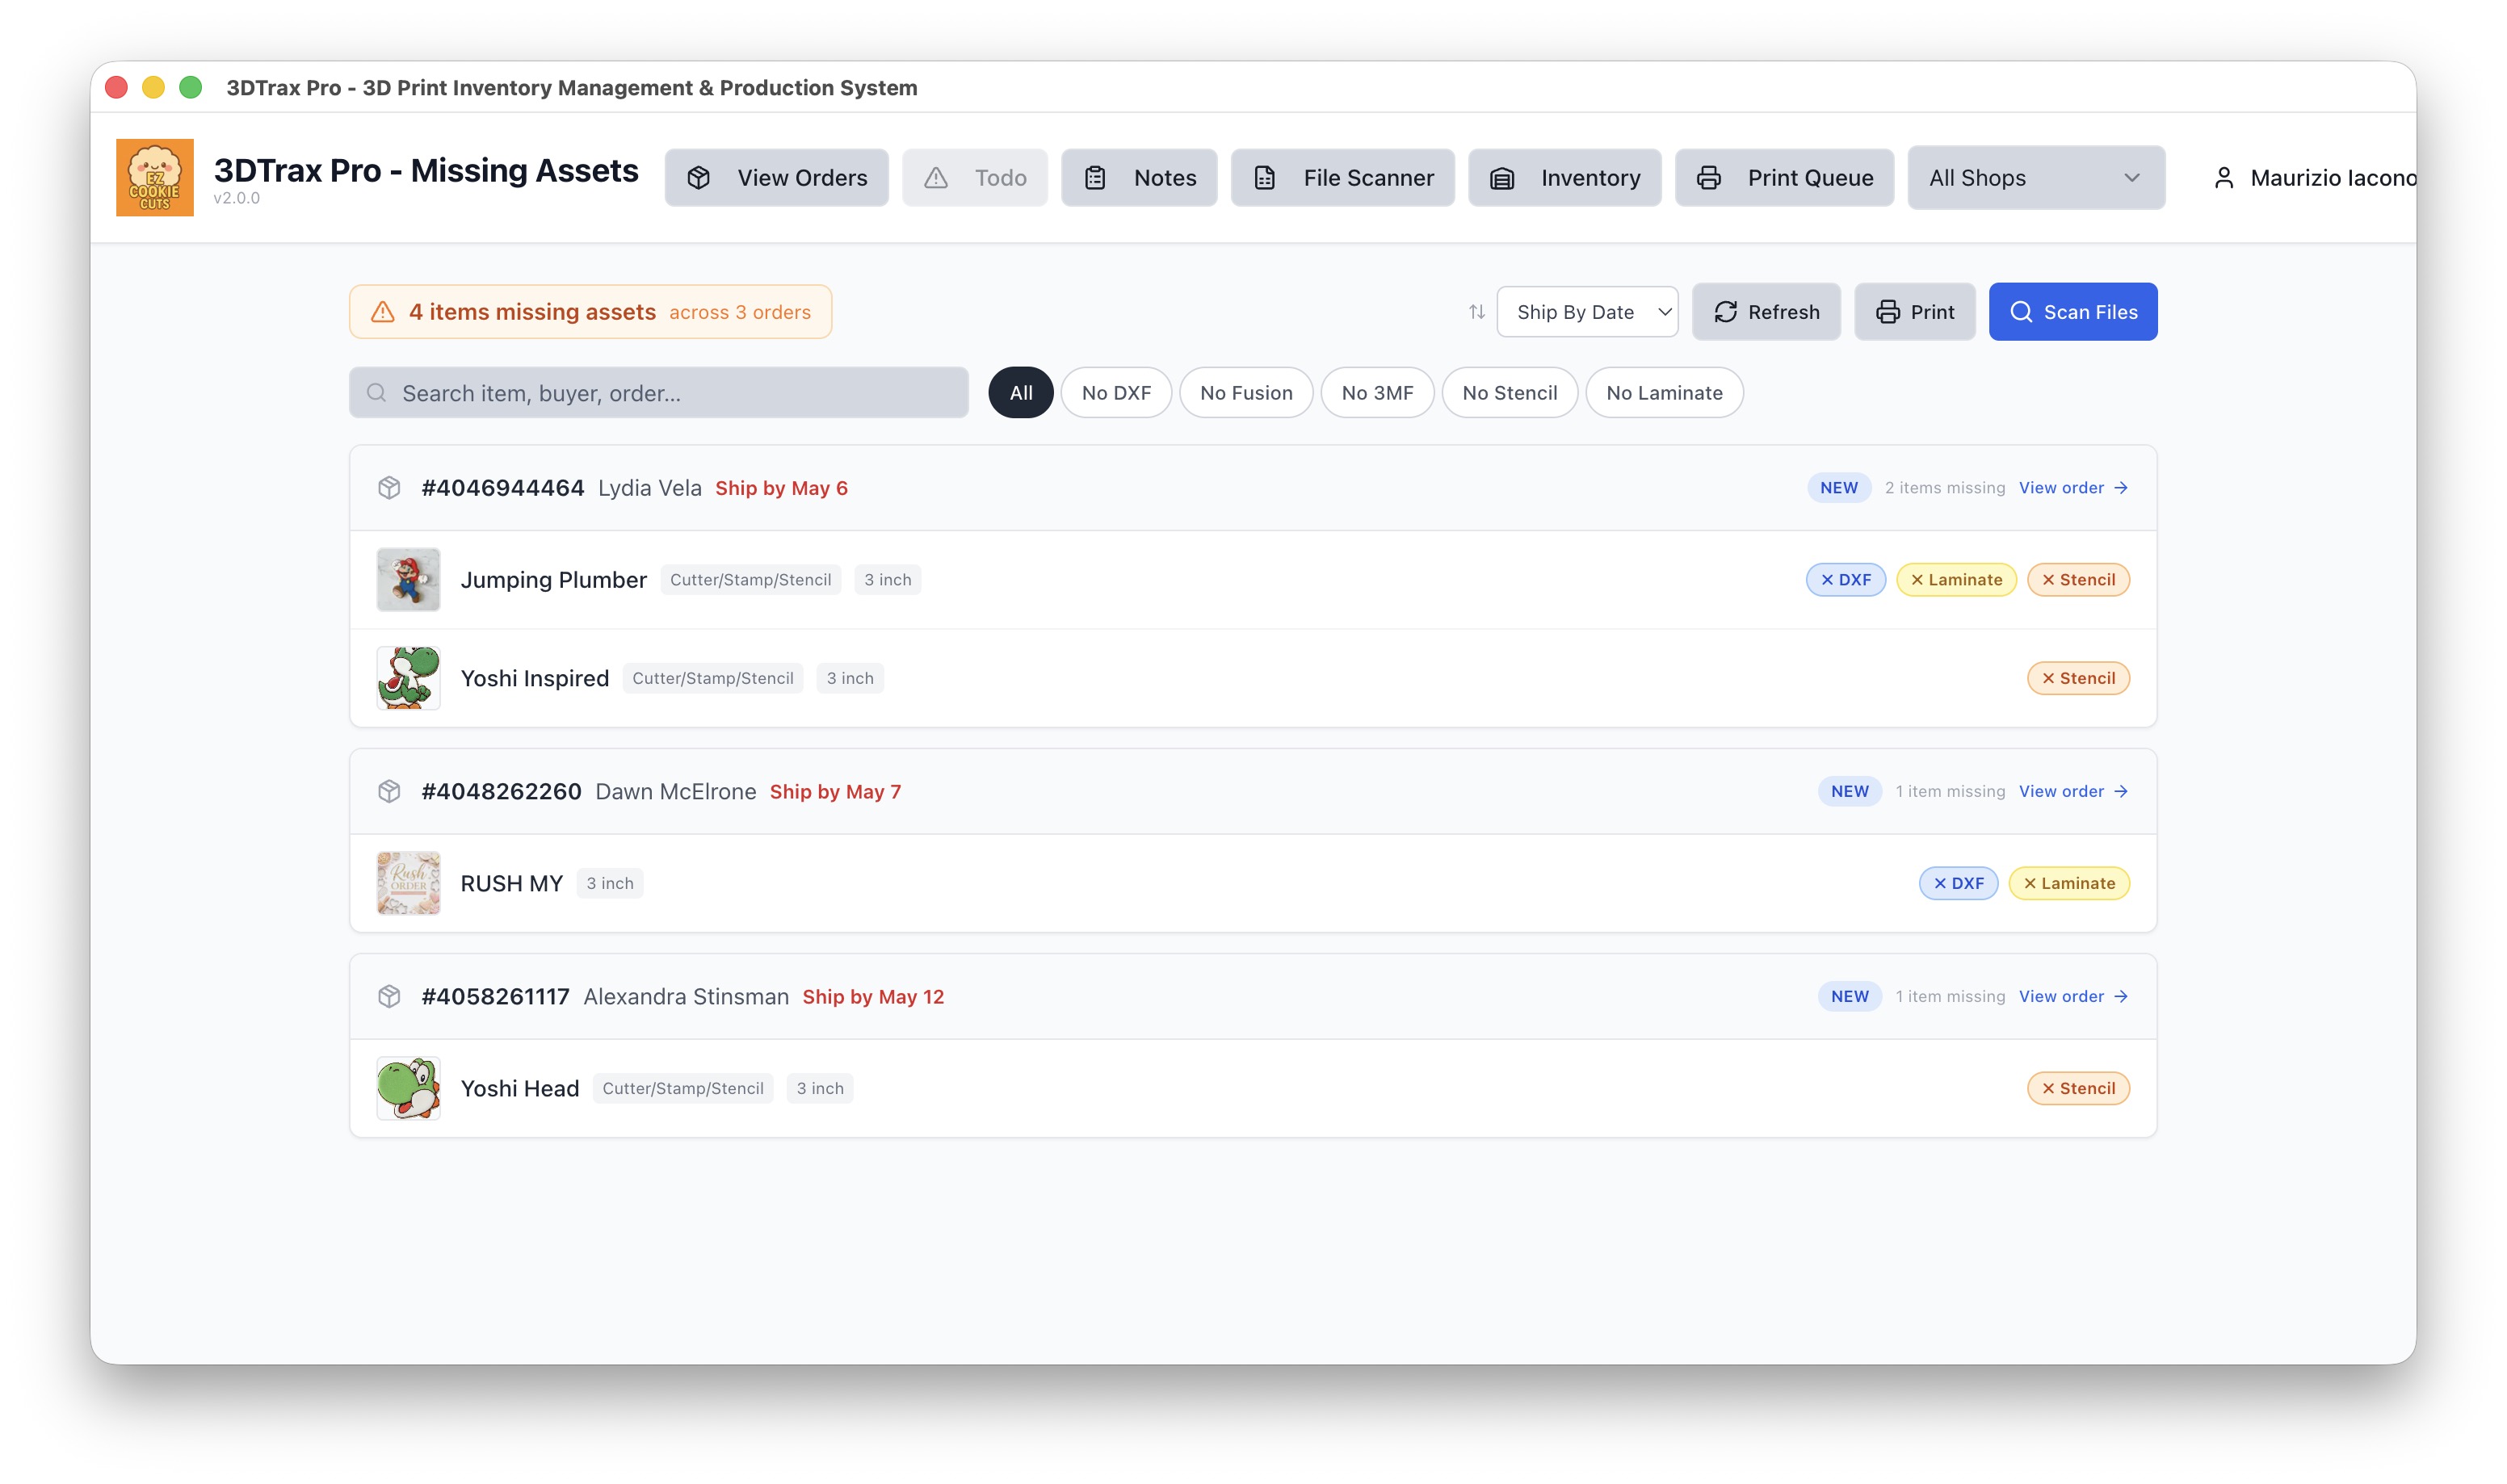
File Scanner
Visual file browser showing which designs have complete file sets.
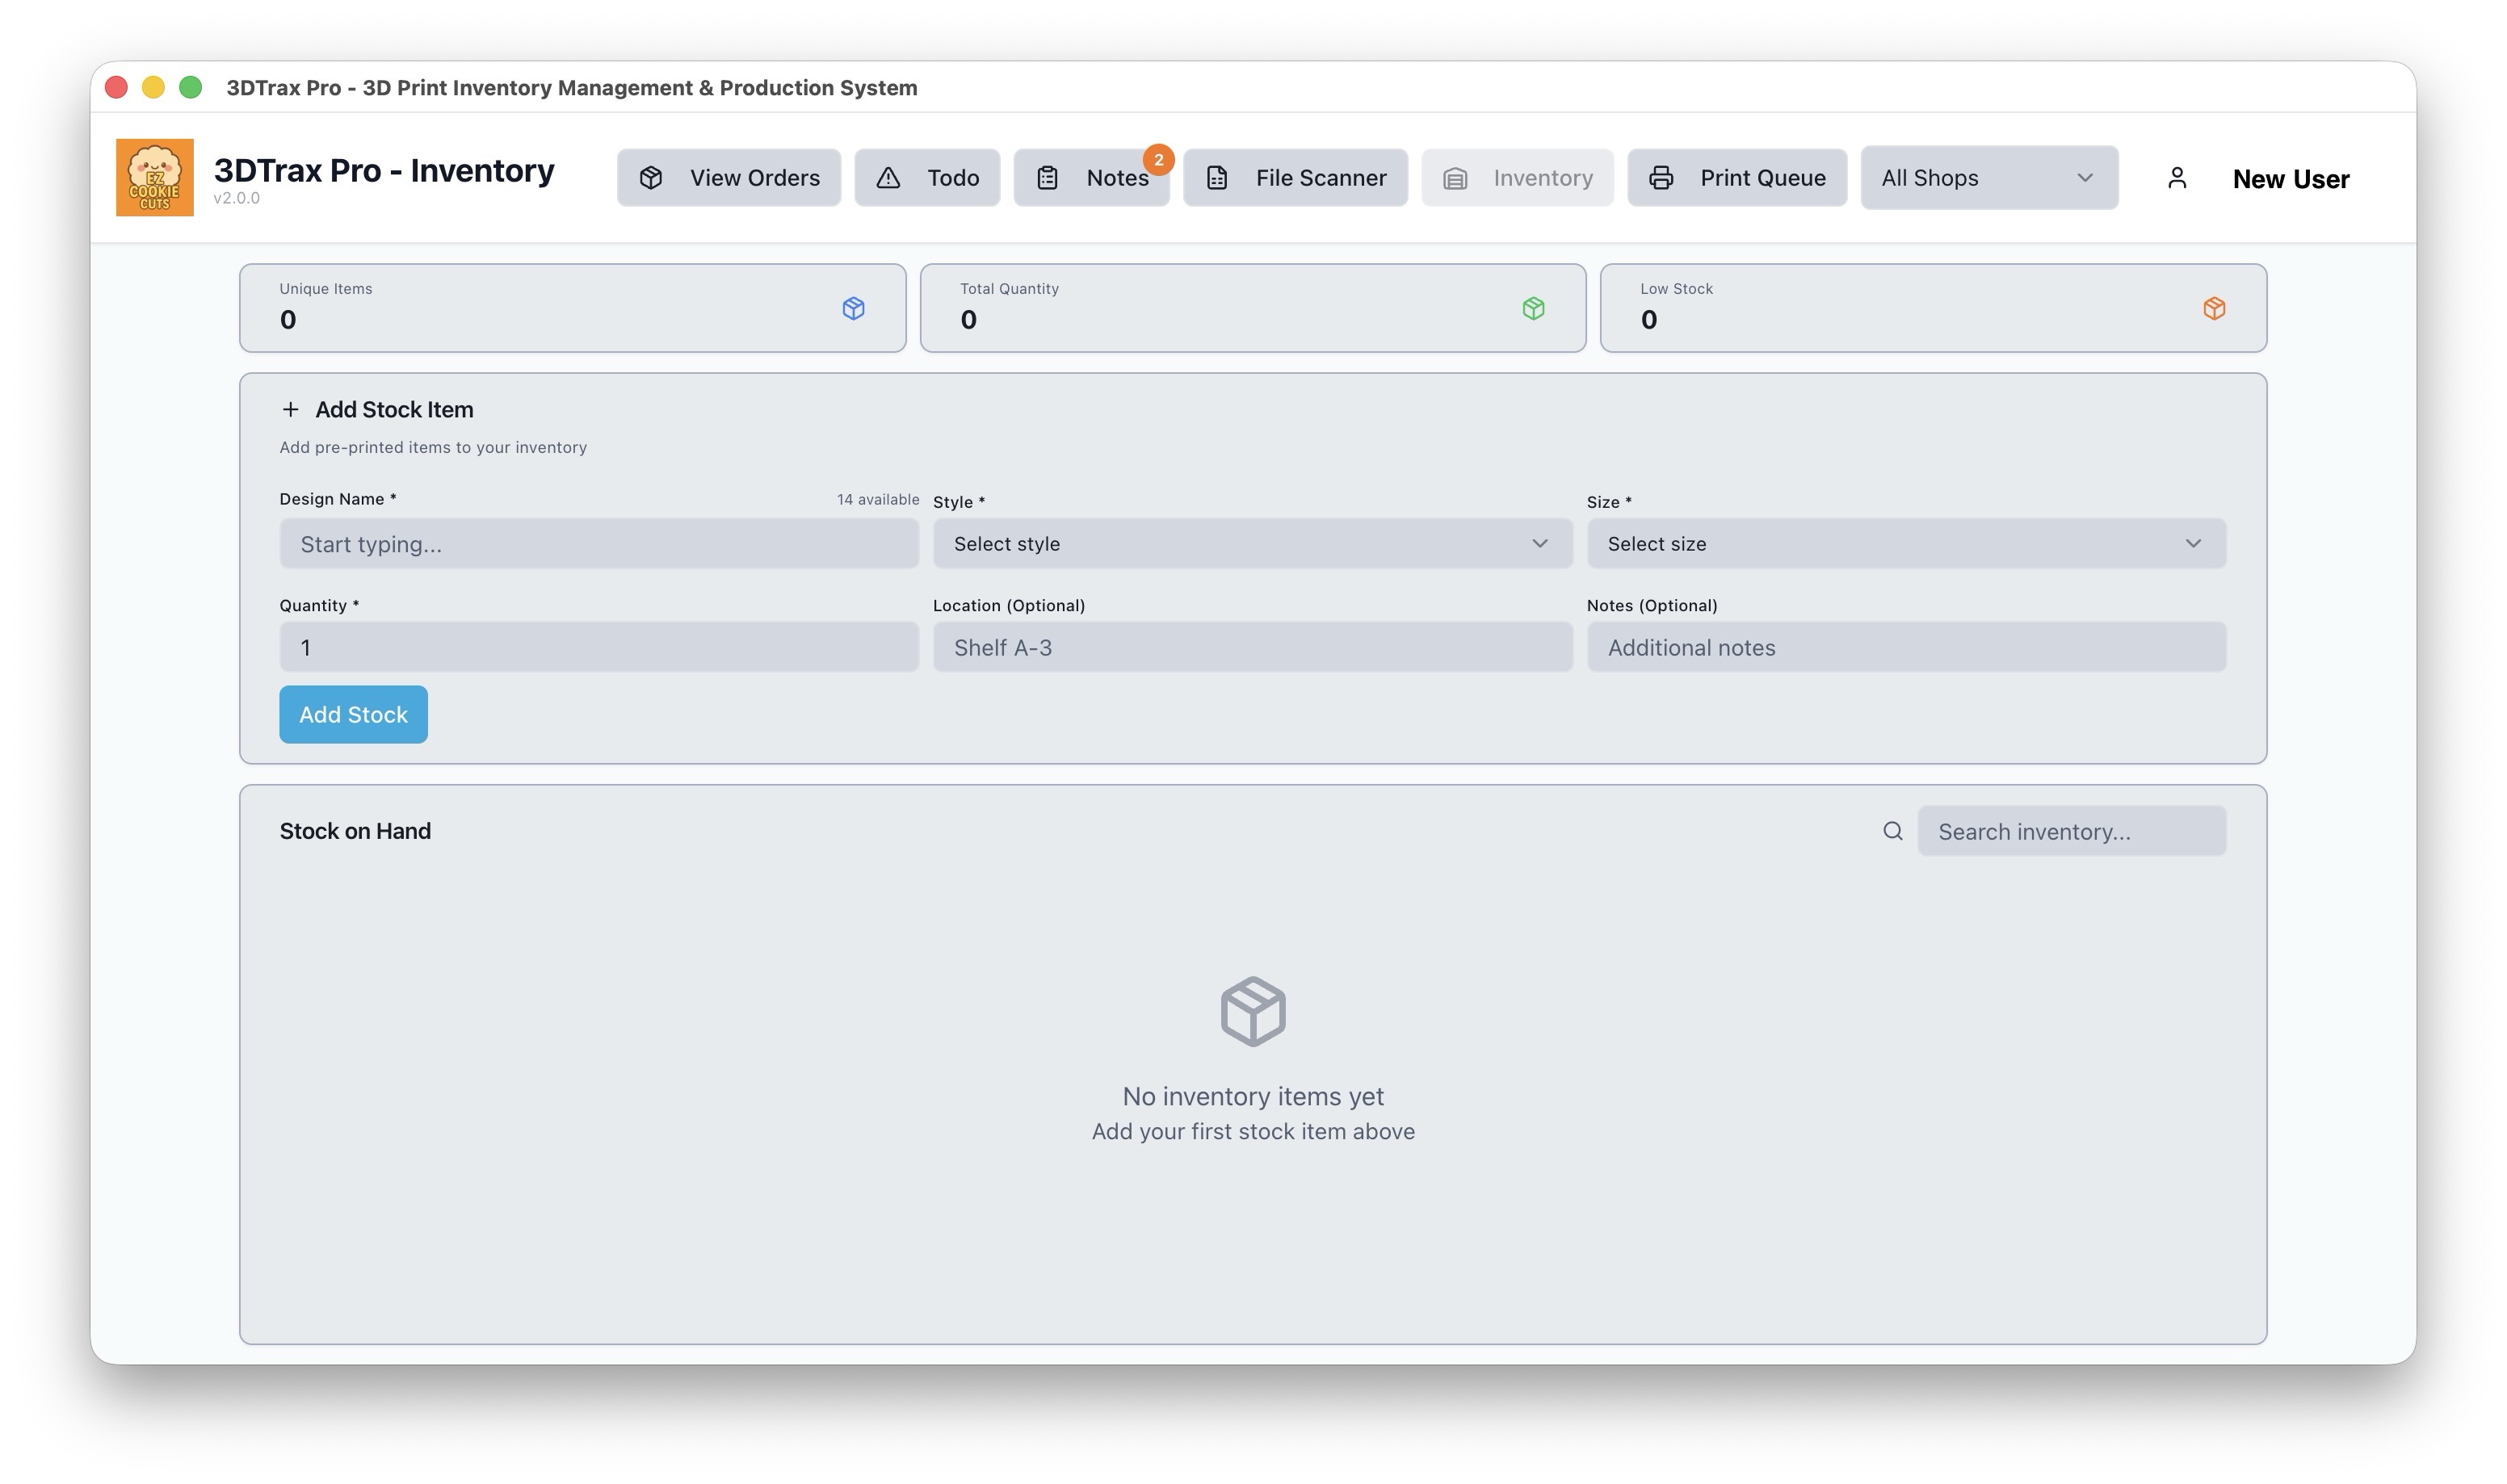
Inventory
Track filament stock, usage, and low-stock alerts.